Blog

  • 어릴 때 이것 키워주지 않으면 후회해도 소용없어요 — 2026년 기준 수학 사고력, 지금 안 잡으면 진짜 늦습니다

    얼마 전에 초등학교 3학년 아이를 둔 지인이 전화를 했어요. 애가 수학을 너무 싫어한다고, 학원을 보내야 하나 말아야 하나 고민이라고요. 이야기를 들어보니 문제집 풀리기는 하는데, 왜 그 식이 성립하는지는 전혀 모른다는 거예요. 답만 맞추는 아이. 그게 문제였습니다.

    저도 솔직히 예전엔 ‘수학이야 문제 많이 풀면 되는 거 아니야?’라고 생각했는데, 아이를 두고 보니 완전히 다른 얘기더라고요. 수학 사고력은 단순히 계산 능력이 아니에요. 논리적으로 문제를 구조화하고, 패턴을 발견하고, 추론하는 능력 — 그게 AI 시대에 더 중요해지고 있습니다. 2026년 지금, 이걸 놓치면 나중에 따라잡기가 정말 어렵습니다.

    child math thinking, elementary school problem solving

    📋 목차

    • 수학 사고력이 뭔지부터 제대로 알고 시작하자
    • 시기별 골든타임 — 언제가 진짜 마지노선인가
    • 유형별 비교: 학습지 vs 사고력 수학 vs 코딩 수학
    • 국내외 사례로 보는 수학 사고력 교육의 실제
    • 절대로 하지 말아야 할 실수 5가지
    • FAQ — 댓글로 자주 오는 질문들
    • 결론 및 한 줄 평

    수학 사고력, 대체 그게 뭔데요?

    수학 사고력(Mathematical Thinking)은 단순 연산이 아니라 문제를 분해하고, 조건을 정리하고, 최적의 경로를 찾는 메타인지 능력입니다. 쉽게 말하면 ‘어떻게 풀어야 하는지를 스스로 설계하는 능력’이에요.

    2026년 현재, OECD PISA 2025 예비 데이터에 따르면 수학 상위권 국가(싱가포르, 일본, 에스토니아)의 공통점이 바로 ‘개념 기반 수학 교육’이에요. 문제 풀이 반복이 아니라, 왜 이 공식이 성립하는지를 가르치는 거죠.

    반면 한국은 여전히 연산 속도와 문제 풀이량에 집중하는 경향이 강한데, 이게 초등 저학년 때는 성적이 좋게 보여도 중학교 1~2학년에서 ‘수포자(수학 포기자)’를 만드는 주요 원인으로 지목됩니다.

    math concept visualization, Singapore math curriculum

    골든타임 — 언제까지가 진짜 마지노선인가

    결론부터 말할게요. 초등학교 1~4학년, 즉 만 7~10세가 수학 사고력의 골든타임입니다. 뇌과학적으로 이 시기에 전두엽의 논리적 연결망이 폭발적으로 발달하거든요.

    하버드 교육대학원 연구(2023)에 따르면, 8세 이전에 수학적 패턴 인식 훈련을 받은 아이는 10세 이후 시작한 아이보다 중학교 수학 성취도가 평균 23% 높게 나타났습니다. 단순히 성적 얘기가 아니에요. 사고의 구조 자체가 달라지는 거예요.

    초등 5학년이 넘어가면 개념의 빈틈을 메우는 데 훨씬 많은 시간과 비용이 들어갑니다. 학원비로 따지면 초등 저학년에 월 10~15만 원짜리 사고력 수학을 2년 투자하는 게, 중학교 이후 월 40~60만 원짜리 수학 과외를 3년 하는 것보다 실효성이 훨씬 높습니다.

    ⚠️ 시기를 놓치면 진짜 어렵습니다. 중학교 올라가서 ‘이제부터 개념 다시 잡자’고 하면, 이미 연산 반복으로 굳어진 사고 습관을 깨는 데 6개월~1년이 걸려요. 그 사이에 내신은 계속 쌓이죠.

    유형별 비교 — 무엇을 선택해야 하나

    유형 대표 프로그램 월 비용 (2026 기준) 강점 약점 추천 연령
    연산 학습지 기탄수학, 눈높이 2~5만 원 가격 저렴, 루틴 형성 사고력 발달 거의 없음 유아~초1 보조용
    사고력 수학 CMS에듀, 씨매스, 영재사고력 15~30만 원 개념·추론 강화, 수학올림피아드 연계 비용 부담, 선생님 편차 큼 초1~초4 핵심기
    코딩+수학 융합 매쓰피아, 코드클럽 10~20만 원 논리 구조화, AI 시대 연계 수학 개념 깊이 부족 초2~초5
    온라인 수학 플랫폼 칸아카데미, 매쓰플래닛 무료~5만 원 자기주도 학습, 비용 효율 자기통제력 필요, 피드백 부족 초3 이상 (자기주도 가능 시)
    수학 전문 학원 시매쓰, 와이즈만 25~45만 원 체계적 커리큘럼, 집단 토론 비용 높음, 위치 제한 초2~중1

    이 상황이라면 A: 아이가 수학을 싫어하고 개념이 무너진 상태라면 → 사고력 수학 전문 소그룹 수업 (CMS, 씨매쓰) 먼저 2~3개월 집중 투자.

    저 상황이라면 B: 아이가 수학을 좋아하고 심화를 원한다면 → 수학올림피아드 트랙 + 칸아카데미 병행으로 자기주도 사고력 확장.

    국내외 사례로 보는 수학 사고력 교육의 실제

    싱가포르 모델 (Singapore Math): 전 세계에서 가장 많이 벤치마킹되는 수학 교육 방식이에요. 핵심은 ‘구체(Concrete) → 그림(Pictorial) → 추상(Abstract)’의 CPA 학습 단계입니다. 물건을 직접 세어보고, 그것을 그림으로 표현하고, 마지막에 숫자로 추상화하는 거죠. 2026년 현재 한국의 사교육 시장에도 이 커리큘럼을 도입한 학원이 늘고 있어요.

    국내 사례 — 영재학교 합격생 부모 인터뷰: 서울과학고 합격생 A군(2025년)의 어머니는 언론 인터뷰에서 “초등 2학년부터 사고력 수학을 시작했고, 문제를 틀려도 왜 틀렸는지 스스로 설명하게 했다”고 밝혔어요. 정답보다 과정을 중시하는 메타인지 훈련이 핵심이었다는 거죠.

    미국 STEM 교육 트렌드: 미국 교육부의 2025년 보고서에 따르면, 수학 성취도 상위 15% 학생의 공통 특징은 ‘수학 일기(Math Journal)’를 쓴 경험이 있다는 것입니다. 하루 5분, 오늘 배운 개념을 자기 언어로 설명하는 것만으로도 장기 기억 전환율이 37% 높아진다는 데이터가 있습니다.

    절대로 하지 말아야 할 실수 5가지

    • 실수 1: 오답을 틀렸다고만 혼내기 — 오답 노트 없이 감정적으로 혼내면 아이는 수학을 ‘실패의 공간’으로 인식합니다. 틀린 이유를 아이 스스로 말하게 하세요.
    • 실수 2: 학년보다 빠르게 선행만 추구하기 — 현재 학년 개념이 완전히 내재화되지 않은 상태에서 선행을 하면 ‘모래 위의 성’이 됩니다. 특히 분수, 소수 개념은 절대로 건너뛰면 안 됩니다.
    • 실수 3: 학원만 믿고 확인 안 하기 — 월 30만 원짜리 학원을 보내도 부모가 주 1회 아이에게 배운 내용을 설명시키지 않으면 효과가 반토막입니다.
    • 실수 4: 초등 고학년까지 결정을 미루기 — ‘아직 어리니까 나중에’는 수학에서 가장 위험한 말입니다. 골든타임을 놓치면 비용과 시간이 2~3배 들어갑니다.
    • 실수 5: 문제 풀이 속도로만 평가하기 — 계산이 빠른 아이가 수학을 잘한다고 착각하는 건 초등 저학년 부모의 가장 흔한 오해입니다. 느려도 논리적으로 설명할 수 있는 아이가 중장기적으로 훨씬 강합니다.

    FAQ

    Q1. 초등 5학년인데 지금 시작해도 늦지 않았나요?

    솔직히 말할게요 — 골든타임은 지났습니다. 하지만 불가능한 건 아니에요. 다만 전략이 달라져야 해요. 지금은 개념의 ‘빈틈 진단’부터 시작해야 합니다. 진단 테스트(씨매쓰, CMS 등에서 무료 제공)를 통해 어느 개념에서 구멍이 났는지 파악하고, 그 부분을 집중적으로 메우는 방식으로 접근하세요. 6개월이면 기반은 다시 잡을 수 있습니다.

    Q2. 사고력 수학 학원과 일반 수학 학원, 뭐가 다른 건가요?

    일반 수학 학원은 주로 교과서 진도+문제 풀이 중심이에요. 내신 점수 올리기에 특화되어 있죠. 사고력 수학 학원은 KMO(한국수학올림피아드) 스타일의 비교과 문제, 논리 퍼즐, 스스로 증명하기 등을 다룹니다. 초등 때는 사고력, 중학교부터는 두 가지를 병행하는 게 이상적이에요.

    Q3. 집에서 부모가 직접 할 수 있는 방법이 있나요?

    있어요. 세 가지만 지켜보세요. ① 주 3회, 아이에게 수학 문제 하나를 풀어달라고 하고 ‘왜 그렇게 풀었는지’를 말로 설명하게 하세요. ② 유튜브 채널 ‘수학방’, ‘칸아카데미 한국어판’을 활용해 개념 영상을 함께 시청하세요. ③ 보드게임 ‘러미큐브’, ‘블로커스’ 같은 전략 게임을 정기적으로 하세요. 공간 감각과 경우의 수 사고가 자연스럽게 발달합니다.

    결론 — 한 줄 평

    수학 사고력은 학원비의 문제가 아니에요. 타이밍과 방향의 문제입니다. 2026년 현재, AI가 계산은 다 해주는 시대에 아이에게 필요한 건 ‘계산기 이상의 인간’이 되는 능력 — 즉, 문제를 구조화하고 논리적으로 해결하는 힘입니다. 비용이 걱정된다면 칸아카데미+수학 일기 조합만으로도 시작할 수 있어요. 중요한 건 지금 당장 시작하는 겁니다.

    주관적 평점: ⭐⭐⭐⭐⭐ (5/5) — 투자 대비 미래 수익률이 가장 높은 교육 영역. 주식보다 낫습니다.

    마지막으로 한마디 드리자면, 아이가 수학을 싫어한다고 했을 때 그냥 넘기지 마세요. 그 싫어함의 뿌리가 개념의 구멍인지, 방식의 문제인지부터 진단해보세요. 거기서 모든 게 달라집니다. 나중에 ‘그때 잡아줄걸’이라고 후회하는 부모를 저는 너무 많이 봤거든요.


    📚 관련된 다른 글도 읽어 보세요

    태그: []

  • Why My First Solo Trip Fell Apart — Real Traveler’s Guide to Solo Travel Safety in 2025

    A friend of mine — seasoned backpacker, spreadsheet-level planner — came back from what was supposed to be a dream trip through Southeast Asia looking like she’d run a marathon in the wrong direction. Not because of anything dramatic, but because she’d cobbled her safety strategy together from Reddit threads that were three years old and a YouTube video with 200 views. She said, ‘I thought I had it figured out.’ She didn’t. And honestly? Neither did I on my first solo trip.

    Solo travel in 2025 is genuinely thrilling. But the gap between ‘prepared’ and ‘overconfident’ can mean the difference between a story you laugh about later and one that still gives you chills. Let’s think through this together — practically, sensibly, and with real-world context.

    solo traveler safety tips, woman backpacking city street

    The Real Risk Landscape Has Shifted in 2025

    Post-pandemic travel has rebounded hard. According to the UNWTO’s 2025 Tourism Barometer, international arrivals are projected to exceed pre-2020 levels by 12% this year, with solo travel accounting for roughly 23% of all leisure trips — up from 16% in 2019. That’s a lot of people navigating unfamiliar cities, currency systems, and emergency protocols on their own.

    What’s changed? A few things worth knowing:

    • Digital infrastructure gaps persist: eSIM coverage is excellent in Japan, South Korea, and most of Western Europe — but in parts of Central America and West Africa, you’re still dependent on local SIM acquisition, which carries its own scam risks at airport kiosks.
    • Petty theft has spiked in high-tourism urban zones: Barcelona, Rome, and Paris have all seen 15–30% increases in tourist-targeted pickpocketing since 2023, per local municipal crime data.
    • Emergency response times vary wildly: In urban Japan or Scandinavia, emergency services average under 7 minutes. In rural Morocco or parts of Southeast Asia, that number can stretch to 40+ minutes.
    • Scam sophistication has evolved: The ‘too friendly local’ approach has been replaced by QR code scams, fake Wi-Fi hotspots, and even AI-generated fake booking confirmation emails.

    What Actually Protects You (The Unglamorous List)

    Most solo travel safety content reads like a checklist written by someone who’s never actually panicked in a foreign train station. Let’s be honest about what moves the needle:

    • Offline maps, always: Google Maps and Maps.me both allow full offline downloads. Download your destination city before you land — not while you’re standing at baggage claim burning through roaming data. Bonus: Organic Maps is a strong open-source alternative for rural hiking routes.
    • Two-factor backup communication: Don’t rely solely on your phone. A cheap secondary device or even a written card with your accommodation address, emergency contacts, and local emergency numbers (not just 911 — Japan is 110/119, France is 15/17/18) is worth its weight.
    • Travel insurance with evacuation coverage: Not all policies are equal. World Nomads and SafetyWing both offer 2025-updated policies that include emergency medical evacuation — a feature that becomes critical if you’re more than 100km from a major hospital. Basic policies that cap at $10,000 medical coverage are essentially useless in countries with high private healthcare costs.
    • Accommodation vetting beyond star ratings: Filter Booking.com and Hostelworld reviews specifically for solo travelers (search ‘solo’ in review keyword filters). A 9.2-rated hostel for groups might score 7.1 among solo women — that discrepancy tells you something.
    • Situational awareness training, not paranoia: The Left of Bang methodology — originally developed for military personnel — teaches recognizing baseline behavior in a given environment and spotting deviations. A free summary by Patrick Van Horne is available on his site and takes about 20 minutes to read. It’s genuinely useful, not fear-mongering.

    Destination-Specific Risk Profiles Worth Knowing

    Generic safety advice ignores the fact that risk is highly location-dependent. Here’s a ground-level breakdown based on 2025 traveler reports and official advisories:

    Southeast Asia (Thailand, Vietnam, Indonesia): Generally low physical threat for solo travelers, but transport scams (tuk-tuk overcharges, taxi meter ‘broken’ scenarios) and drink spiking in nightlife areas remain consistent concerns. Stick to Grab or Gojek ride-hailing apps — they provide driver ID, route tracking, and price locks.

    Eastern Europe (Poland, Czech Republic, Hungary): Statistically very safe by crime metrics, but currency exchange scams at non-bank kiosks (particularly around tourist squares) are rampant. Always use ATMs attached to bank branches, not standalone street machines.

    Latin America (Colombia, Mexico, Peru): The narrative has shifted. Medellín and Mexico City both have thriving solo travel communities and are genuinely navigable with preparation. That said, express kidnapping (brief forced ATM withdrawals) remains a documented risk in specific city zones. Neighborhood granularity matters enormously here — a 10-block difference can change your risk profile significantly. Use NomadList.com’s safety breakdowns by district alongside State Department advisories.

    travel safety checklist, solo traveler planning map

    The Digital Safety Layer Most People Skip

    Physical safety gets all the attention, but your digital presence while traveling is a real vulnerability. Public Wi-Fi in airports, cafés, and hostels is a known attack surface. A few specific measures:

    • VPN before you go: Mullvad and ProtonVPN both offer solid no-log policies. Set it up at home, not at the airport. Free VPNs in app stores often log your data — which is the exact opposite of the goal.
    • Separate travel email: Create a throwaway Gmail or ProtonMail address for booking confirmations, tour sign-ups, and anything that requires a local registration. Keeps your primary inbox (and its linked accounts) cleaner and safer.
    • Location sharing with a trusted contact: Share your Google Maps real-time location with one person back home who knows your itinerary. Not because something will go wrong, but because ‘someone knows where I am’ is a meaningful psychological safety net and a practical one if you go quiet unexpectedly.

    When Things Actually Go Wrong — The Practical Response

    Most solo travel safety content ends before the hard part: what happens when the preparation fails and you’re actually in a bad situation?

    Step one is almost always the same: get to a well-lit, populated commercial space (a hotel lobby, a large pharmacy chain, a fast food outlet with staff). Not a side street, not a park. A place with staff, cameras, and other people.

    Step two: contact your country’s nearest embassy or consulate. Have those numbers saved offline before you travel. The U.S. State Department’s Smart Traveler Enrollment Program (STEP) is free, takes five minutes, and means your embassy already knows where you’re supposed to be. Similar programs exist for UK (FCDO), Australian (Smartraveller), and Canadian (Registration of Canadians Abroad) travelers.

    Step three: document everything immediately. Incident numbers, officer names, timestamps. Your travel insurance claim will go nowhere without paper trails, and memory degrades fast under stress.

    Solo Travel in 2025: Still Worth It?

    Absolutely — and not in spite of the complexity, but partly because of it. The research, the preparation, the moment you successfully navigate something that would have paralyzed you two years ago — that’s part of what solo travel gives you. The goal isn’t to eliminate risk. It’s to make intelligent, informed tradeoffs.

    If your situation is ‘first-time solo traveler, budget-conscious, safety-anxious’ — start with a structured destination: Japan, Portugal, or New Zealand. Low crime, excellent transport, English-friendly, manageable solo infrastructure. Build confidence there before heading somewhere with a steeper learning curve.

    If you’re an experienced solo traveler looking to push further — Colombia, Georgia (the country), or Morocco offer depth, challenge, and genuine reward, with preparation making all the difference between transformative and traumatic.

    Editor’s note: The best safety tool you have isn’t an app or a gadget — it’s the habit of paying attention. Real safety comes from being present, adaptable, and honest about what you don’t yet know. Go with curiosity, stay with awareness, and the world tends to meet you halfway.


    📚 관련된 다른 글도 읽어 보세요

    태그: solo travel safety, solo travel tips 2025, travel safety guide, first time solo traveler, international travel safety, travel insurance, solo female travel

  • Why I Almost Missed My Flight Trusting Bad Advice — Real 2025 Bangkok to Chiang Mai Travel Guide

    A friend of mine — seasoned traveler, been to Southeast Asia four times — called me a few weeks ago in a mild panic. He’d booked a sleeper bus from Bangkok to Chiang Mai based on a blog post from three years ago, only to find the terminal had moved, the pricing had jumped nearly 40%, and the schedule he’d memorized was completely wrong. Three hours of scrambling later, he made it — barely. That call is basically why I decided to sit down and write this properly.

    Getting from Bangkok to Chiang Mai is one of Thailand’s most iconic journeys, but it’s also one of the most deceptively complicated ones. There are four main options, each with wildly different trade-offs depending on your budget, timeline, and comfort threshold. Let’s actually think through them together.

    Bangkok to Chiang Mai train station, Thailand night train departure

    The Four Real Routes in 2025 — And What They Actually Cost

    Here’s the honest breakdown as of mid-2025:

    • Flight (Bangkok–CNX): AirAsia, Thai Lion Air, and Nok Air run this route multiple times daily. Budget fares during off-peak periods (May–August, excluding Thai holidays) run about ฿499–฿899 one-way if booked 3+ weeks out. Add airport transfer time on both ends and you’re looking at ~4.5 hours door-to-door from central Bangkok to Chiang Mai’s Nimman area. Key risk: bag fees can double the price if you’re not careful — AirAsia’s 20kg add-on runs ฿250–฿500 depending on booking timing.
    • Overnight Train (Hua Lamphong → Chiang Mai): The SRT (State Railway of Thailand) No. 9 and No. 13 express trains depart Hua Lamphong around 18:00–19:30. A second-class air-conditioned sleeper berth runs ฿600–฿800 (lower bunk ฿50–฿100 more). Travel time is approximately 12–13 hours, arriving around 07:00–08:30. This saves a night of accommodation — genuinely useful math if you’re budget-conscious.
    • VIP Bus (Mo Chit → Arcade Bus Terminal, Chiang Mai): Several operators including Transport Co. and Nakhonchai Air run overnight VIP coaches. Fares sit around ฿600–฿900 for a proper reclining seat. Journey time is roughly 9–10 hours but can stretch to 11+ during long weekends. My friend’s mistake was trusting an old terminal address — the Northern Bus Terminal (Arcade) is the correct drop-off in Chiang Mai, and Mo Chit 2 is the main Bangkok departure point, not the old Southern Terminal.
    • Private Van or Minivan Share: Running ฿250–฿350 per seat, these depart from various spots including Victory Monument. They’re faster in theory (8 hours) but comfort is questionable and safety records are mixed. I’d only recommend this if you’re traveling in a group of 4+ and can book a whole van.

    Train vs. Plane — The Real Decision Framework

    Here’s how I’d frame it: if your time in Thailand is under 10 days, fly. The hour you save adds up when you factor in temples, cooking classes, and night markets. But if you’re traveling for 2+ weeks or you’re genuinely interested in the landscape (the stretch through Lopburi and the mountainous approach into Chiang Mai is legitimately beautiful), the overnight train earns its reputation.

    The train’s practical advantage people overlook: Hua Lamphong station is right on the MRT Blue Line, making it genuinely accessible from Sukhumvit or Silom without a taxi. Don Mueang Airport (where most budget flights depart) requires a dedicated transfer — budget 60–90 minutes minimum from central Bangkok. That gap narrows the flight’s time advantage considerably.

    Book train tickets through the official SRT online system (railway.co.th) or through 12Go.asia, which adds a small booking fee (~฿50–฿100) but has a more user-friendly interface and English-language support. Avoid third-party “agents” on Khao San Road charging double the rate.

    Chiang Mai night market arrival, Thailand overnight train interior sleeping berth

    What the Blogs Don’t Tell You About Arriving in Chiang Mai

    Both Chiang Mai Airport and the Arcade Bus Terminal are well-served by Grab (rideshare), and fares to the Old City or Nimman Rd run ฿80–฿150. The train station is even more central — it’s essentially walkable to the Night Bazaar area and a short Grab ride to Nimman (฿50–฿70).

    Timing matters a lot here. If you’re arriving during Songkran (Thai New Year, usually April 13–15), expect every transport option to be fully booked 3–4 weeks out. Same goes for the Loy Krathong/Yi Peng lantern festival in November — Chiang Mai specifically draws massive crowds for that one. Book accommodation and transport simultaneously during those windows.

    The rainy season (June–October) doesn’t actually kill the Bangkok-Chiang Mai route the way it does beach destinations. Chiang Mai stays relatively accessible, though northern trekking routes can get muddy and some mountain roads occasionally close. The upside: hotel prices in Chiang Mai drop 30–50% compared to high season, and popular sites like Doi Inthanon National Park are lush and less crowded.

    Off-Season Reality Check — May Through August

    If you can handle occasional afternoon downpours, May through August offers genuinely good value. A solid guesthouse in the Nimman area that runs ฿1,200–฿1,500/night in peak season can drop to ฿700–฿900. Airfare follows the same pattern. The temples (Doi Suthep, Wat Chedi Luang) are cool and misty in the mornings, and you’ll share them with a fraction of the high-season crowds. The main downside is occasional air quality concerns if controlled burns happen early in the season (March–April is worse, but residual haze can linger into May).

    • Peak Season (Nov–Feb): Best weather, most expensive, most crowded. Book everything 4–6 weeks ahead.
    • Shoulder (Mar–Apr): Hot and hazy but manageable. Songkran is uniquely fun if crowds don’t bother you.
    • Off-Season (May–Oct): Budget-friendly, green, authentic. Afternoons are wet but mornings are often clear.

    Quick Reference — Key Booking Resources

    • SRT Train Booking: railway.co.th (official) or 12Go.asia (English-friendly)
    • Budget Flights: airasia.com, nokair.com — set fare alerts 3–4 weeks before travel
    • Bus Tickets: Transport Co. at Mo Chit 2 terminal; book in person or via thaiticketmajor.com
    • Chiang Mai Accommodation: Hostelworld for budget; Agoda has strong Thailand inventory across all price points
    • Local Transport in Chiang Mai: Grab app works reliably; songthaew (red shared trucks) run fixed routes for ฿30–฿50/person

    There’s genuinely no single “best” way to make this trip. The overnight train is romantic and practical in the right circumstances. The flight is efficient when time is tight. The bus is fine if you’ve confirmed current terminal info (don’t trust posts older than 12 months). What really matters is matching your choice to your actual situation — not to what some algorithm decided was the default recommendation.

    One last thing worth saying: whatever route you pick, build in one buffer day in Chiang Mai before any onward travel. The city has a way of expanding to fill whatever time you give it — a morning at the Warorot Market, an afternoon at a cooking school, a surprise conversation at a coffee shop on Nimman Soi 7. The journey up is just the beginning of it.


    📚 관련된 다른 글도 읽어 보세요

    태그: []

  • 2026년 가성비 쩌는 싱글몰트 위스키 Top3 — 돈 날리기 전에 이것부터 읽어요

    얼마 전 위스키 입문한다는 친구 녀석이 카톡을 보내왔어요. “야, 그냥 발베니 12년 사면 되냐?” 솔직히 발베니가 나쁜 선택은 아닌데, 2026년 현재 환율이랑 수입가 올라서 국내 마트에서 발베니 더블우드 12년이 어느새 10만 원 중반을 넘겼거든요. 예전엔 8만 원대에 ‘무지성 입문 추천’이라고 했는데, 이제는 그 공식이 안 먹혀요.

    저는 위스키 마신 지 12년 됐고, 지금도 한 달에 두세 병은 새로 따는 사람이에요. 보틀 수집이 취미인 건 아니고, 그냥 ‘이 돈 내고 이 맛이 맞나?’ 를 계속 검증하는 편이에요. 그 과정에서 찾아낸 2026년 기준 진짜 가성비 싱글몰트 세 병을 오늘 공유할게요. 단순히 ‘싸다’가 아니라, 가격 대비 경험치가 터지는 병들로만 골랐습니다.

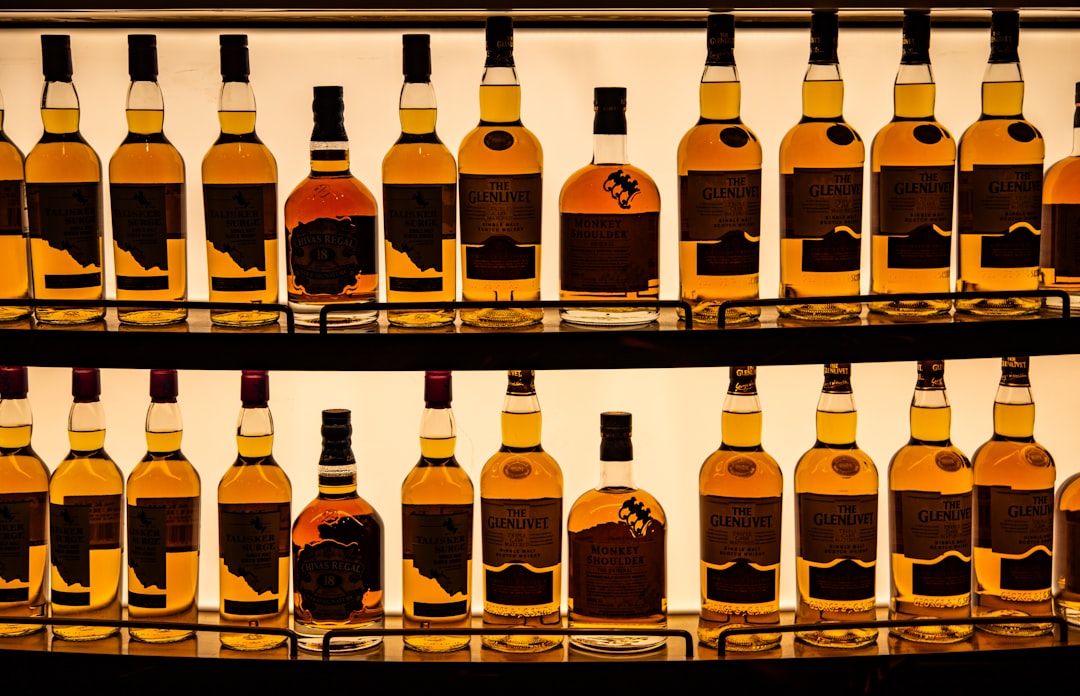
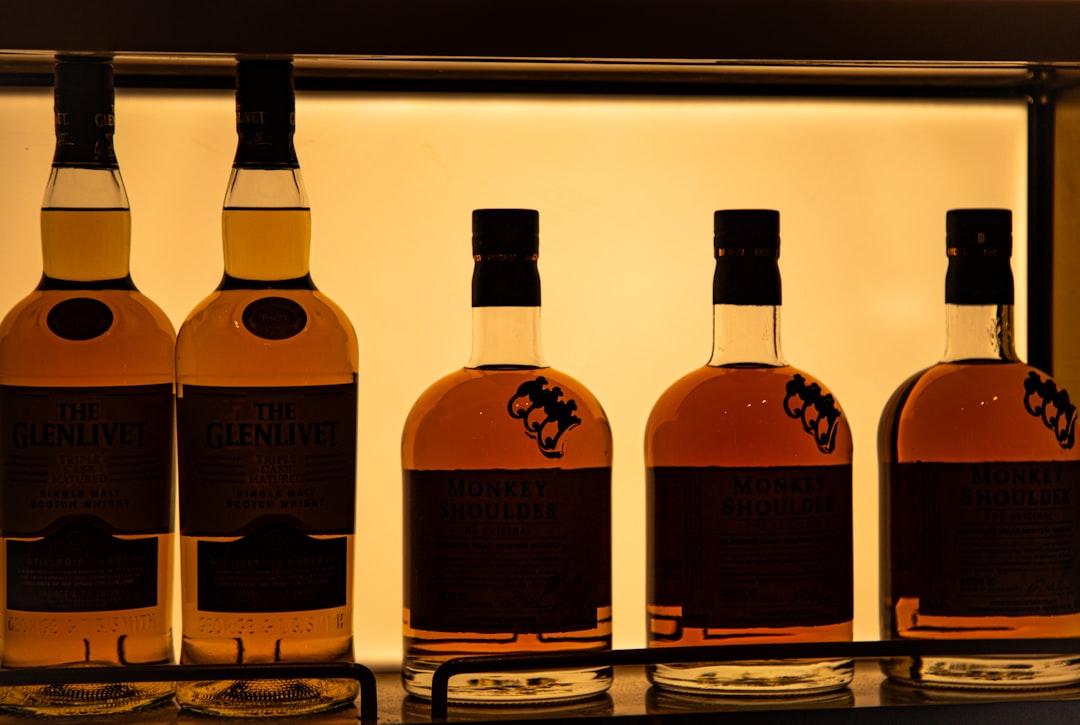
    single malt whisky bottles lineup, whisky tasting glass amber light

    • 🥃 가성비란 무엇인가 — 2026년 위스키 시장 현황 먼저
    • 🏆 1위: 글렌모렌지 오리지날 10년 — 입문자 최적화 설계의 정석
    • 🏆 2위: 아벨라워 12년 더블 캐스크 — 프랑스가 만든 스피사이드의 반란
    • 🏆 3위: 탈리스커 10년 — ‘피트 입문’의 가장 안전한 관문
    • 📊 세 병 스펙 & 가격 비교표
    • 🔍 국내외 리뷰 사이트 교차 검증 결과
    • ❌ 절대로 하지 말아야 할 위스키 구매 실수 7가지
    • ❓ 자주 묻는 질문 (FAQ)
    • ✅ 최종 한 줄 평

    가성비란 무엇인가 — 2026년 위스키 시장 현황 먼저

    2026년 현재 국내 싱글몰트 시장은 크게 두 가지 압력을 받고 있어요. 첫째, 2023~2025년 원/달러 환율 고공행진으로 수입 원가가 올랐고, 둘째, 하이볼 트렌드가 정착되면서 대형마트·편의점에서 위스키를 회전시키는 구조가 바뀌었어요. 결과적으로 ‘예전 가성비 리스트’가 다 옛날 얘기가 됐습니다.

    제가 정의하는 2026년 가성비 기준은 이렇습니다: 5만 원 이상~12만 원 이하, Nose·Palate·Finish 세 구간 모두에서 ‘이게 이 가격이라고?’ 하는 순간이 최소 한 번 이상 있을 것. 이 기준으로 추려낸 게 오늘 소개할 세 병이에요.

    whisky price comparison chart 2026, Korean whisky market retail shelf

    🏆 1위: 글렌모렌지 오리지날 10년 (Glenmorangie Original 10Y)

    Nose: 첫 향은 신선한 복숭아와 살구잼. 거기에 바닐라 크림과 살짝 플로럴한 오렌지 꽃 향이 따라와요. 알코올 치임이 거의 없어서 코를 가까이 들이밀어도 튀지 않아요. 입문자들이 “위스키가 이런 향도 나요?” 하고 놀라는 병입니다.

    Palate: 첫 모금에 꿀, 바닐라, 그리고 아몬드 비스킷 같은 고소함이 동시에 들어와요. 무게감은 미디엄-라이트라서 식사 전 아페리티프로도 나쁘지 않아요. 탄닌이 과하지 않아서 하이볼로 만들면 복숭아 소다 같은 느낌이 되는데, 이게 또 기가 막혀요.

    Finish: 미디엄 길이. 바닐라와 약한 스파이스가 목 넘김 뒤에 남고, 쓴맛 없이 깨끗하게 마무리돼요. 피트나 연기 향 제로. ‘위스키의 입문용 관문’이라는 타이틀이 괜히 붙은 게 아닙니다.

    2026년 현재 국내 실구매가: 이마트·롯데마트 기준 약 6만 5천~7만 5천 원. 면세 채널에서 들여오면 $35~40 수준. ABV 43%. 700ml.

    🏆 2위: 아벨라워 12년 더블 캐스크 (Aberlour 12Y Double Cask)

    Nose: 스위트 스파이스의 교과서. 시나몬 롤, 건포도, 크리스마스 케이크 향이 층층이 올라와요. 셰리 캐스크 영향이 확실한데, 과하게 무겁지 않고 아메리칸 오크와 균형을 맞추고 있어요. 한 번 따면 다음 날 더 향이 열리는 병이라 오픈 후 두 번째 잔이 더 맛있어요.

    Palate: 다크 초콜릿, 건자두, 생강 스파이스. 중간에 버터스카치가 살짝 얼굴을 내밀어요. 무게감은 미디엄-풀이라서 여기서부터 ‘진짜 위스키 마시는 느낌’이 납니다. 물 두세 방울 추가하면 달콤함이 더 피어나요.

    Finish: 롱-미디엄 길이. 오크 탄닌과 건과일 단맛이 20~30초 정도 여운으로 남아요. 살짝 드라이하게 끝나는 느낌이 있는데, 이게 다음 잔을 부르는 구조라 병을 빨리 비우게 만드는 게 유일한 단점.

    2026년 현재 국내 실구매가: 대형마트·주류 전문점 기준 7만~8만 5천 원. 해외 직구 시 £35 내외. ABV 43%. 700ml. 프랑스 샹파뉴 그룹(Chivas Brothers) 산하 스피사이드 증류소라 국내 유통 안정성이 높아요.

    🏆 3위: 탈리스커 10년 (Talisker 10Y)

    Nose: 여기서부터 방향이 완전히 바뀝니다. 해풍, 짭조름한 소금기, 스모키한 피트 향. 거기에 검은 후추와 약간의 과일 향(배, 레몬 제스트)이 뒤에서 받쳐줘요. 처음 맡는 사람은 ‘이게 위스키야?’ 하고 당황할 수 있는데, 10분 정도 글라스에 두면 복잡한 층위가 열려요.

    Palate: 피트와 해염이 먼저 치고, 이후 검은 후추 스파이스가 혀 전체를 자극해요. 그 뒤에 의외로 단맛(꿀, 바나나)이 등장해서 ‘아, 이래서 탈리스커구나’ 하게 됩니다. 아일레이 피트(아드벡, 라프로익)처럼 압도적이지 않아서 ‘피트 입문’으로는 이게 최적이에요.

    Finish: 롱. 후추와 해염 여운이 1분 가까이 지속돼요. 마신 뒤 물 한 모금 마시면 여운이 다시 리셋되는 느낌. 하이볼로 만들면 해산물 요리와 시너지가 폭발합니다. 회, 굴, 연어랑 특히 잘 맞아요.

    2026년 현재 국내 실구매가: 7만 5천~9만 원. 스카이 섬 단일 증류소 제품이라 공급이 한정적이지만, 디아지오 한국 공식 유통이라 단종 리스크 낮아요. ABV 45.8%. 700ml.

    📊 2026년 가성비 싱글몰트 Top3 스펙 & 비교표

    항목 글렌모렌지 오리지날 10Y 아벨라워 12Y 더블 캐스크 탈리스커 10Y
    지역 하이랜드 스피사이드 아일랜드(스카이 섬)
    ABV 43% 43% 45.8%
    캐스크 버번 오크 버번+셰리 더블 캐스크 버번 오크
    피트 수준 없음 없음 중간 (미디엄 피트)
    국내 실구매가 6.5~7.5만 원 7~8.5만 원 7.5~9만 원
    추천 음용법 니트 / 하이볼 니트 / 온더록스 니트 / 해산물 페어링 하이볼
    입문자 적합도 ⭐⭐⭐⭐⭐ ⭐⭐⭐⭐ ⭐⭐⭐ (피트 적응 필요)
    가성비 점수 ★★★★☆ ★★★★★ ★★★★☆
    한 줄 요약 실패 없는 선택 이 가격에 이 맛? 피트 입문의 정석

    🔍 국내외 리뷰 교차 검증 결과

    해외 위스키 리뷰 커뮤니티인 WhiskybaseMaster of Malt 기준으로 세 병 모두 평점 84~88점 구간에 위치해 있어요. 특히 아벨라워 12년 더블 캐스크는 Whiskybase에서 사용자 평점이 꾸준히 높게 유지되는 병인데, 국내에서는 글렌모렌지나 탈리스커 대비 인지도가 낮아서 가격 거품이 덜 껴 있는 상황입니다.

    국내 주류 가격 비교는 데일리샷(Drinksly)이나 네이버 쇼핑 최저가를 기준으로 삼는 게 현실적이에요. 특가 행사가 자주 뜨는 이마트 트레이더스에서는 탈리스커 10년을 가끔 7만 원 초반에 살 수 있으니 장바구니 등록해두는 걸 추천해요. 다만 주류 직구는 국내 법상 개인 반입 기준(면세 한도 $800, 1리터 이하)을 꼭 확인하세요.

    ❌ 절대로 하지 말아야 할 위스키 구매 실수 7가지

    • 유튜브 리뷰 한 개만 보고 사지 마세요. 리뷰어의 미각 민감도와 선호 프로파일이 본인과 다를 수 있어요. 최소 3~4개 교차 확인하세요.
    • ‘숙성 연수가 길수록 좋다’는 공식 버리세요. NAS(No Age Statement) 병 중에 12년산 압도하는 것들 많습니다. 연수는 참고 지표일 뿐이에요.
    • 처음부터 아드벡·라프로익 사지 마세요. 피트 폭탄 먼저 맞으면 위스키 자체를 싫어하게 됩니다. 탈리스커로 피트 적응 후에 넘어가세요.
    • 특가 행사 때 여러 병 묻어두는 것 조심하세요. 개봉 후 6개월 이상 지나면 향이 달라져요. 특히 피트 계열은 열린 병에서 빠르게 변합니다.
    • 냉동실 보관 절대 금지. 냉장도 사실 좋지 않아요. 직사광선 피하고 서늘한 실온 보관이 정석이에요.
    • 온더록스로만 마시는 습관은 피하세요. 얼음이 향을 닫아버려서 첫 인상을 왜곡합니다. 니트로 먼저 맛보고 결정하세요.
    • 희소성·한정판 마케팅에 흔들리지 마세요. 2026년 현재 위스키 한정판 2차 시장 가격이 꺾이고 있어요. 투자 목적의 위스키 구매는 지금 시점엔 비추입니다.

    ❓ FAQ — 자주 묻는 질문

    Q1. 위스키 처음인데 세 병 중 뭐부터 사야 해요?

    무조건 글렌모렌지 오리지날 10년부터 시작하세요. 피트 없고, 향도 과일·바닐라 계열이라 거부감이 거의 없어요. 이걸 반병 정도 마시면서 ‘내가 어떤 방향이 좋은지’ 파악한 뒤에 아벨라워(달콤-묵직)냐 탈리스커(스모키-개성)냐 방향을 정하세요. 순서가 있어요.

    Q2. 아벨라워 12년 vs 발베니 더블우드 12년, 뭐가 더 나아요?

    2026년 기준 가격 차이가 2~3만 원까지 벌어졌어요. 발베니 더블우드가 10만 원 중반이라면 아벨라워 12년은 7~8만 원대. 맛 프로파일은 비슷한 ‘셰리+버번 더블 캐스크’ 계열인데, 가성비는 아벨라워가 압도적으로 앞섭니다. 발베니 브랜드 프리미엄에 돈 내기 싫다면 아벨라워 사세요. 솔직히 말하면 이게 맞아요.

    Q3. 탈리스커 10년 하이볼로 만들면 피트 향이 많이 줄어드나요?

    줄어들긴 하는데 완전히 사라지지는 않아요. 오히려 탄산과 만나면서 후추 스파이스가 더 선명해지는 효과가 있어요. 해산물(굴, 회, 연어 샐러드)이랑 같이 마시면 페어링 시너지가 진짜 제대로 납니다. 피트 향이 아직 낯선 분은 탄산수 비율을 1:4~1:5로 넉넉하게 잡아서 시작하세요.

    ✅ 최종 한 줄 평

    2026년 기준 이 세 병은 ’10만 원 이하에서 싱글몰트 경험을 제대로 하고 싶다’는 사람이라면 고민 없이 선반에 꽂아도 되는 병들입니다. 특히 아벨라워 12년 더블 캐스크는 이 가격에 이 완성도면 솔직히 이상한 거예요. 마케팅을 안 했을 뿐, 품질은 2~3배 비싼 병들과 붙어도 지지 않아요.

    에디터 코멘트: 위스키는 ‘비쌀수록 좋다’는 공식이 아직도 통하는 척하는 시장입니다. 2026년엔 그 공식이 더 이상 맞지 않아요. 제대로 된 한 병이, 브랜드 값에 녹아버린 비싼 두 병보다 훨씬 낫습니다. 오늘 소개한 세 병, 가격 보고 무시하지 마세요. 후회합니다.


    📚 관련된 다른 글도 읽어 보세요

    태그: []

  • 어릴때 이것 키워주지 않으면 후회해도 소용없어요 — 2026년 기준 수학 사고력, 지금 시작 안 하면 진짜 늦습니다

    며칠 전에 초등학교 3학년 자녀를 둔 친구한테 전화가 왔어요. 아이가 수학 문제집은 잘 푸는데, 왜 푸는지 모른다고. 답은 맞히는데 설명을 못 한다고. 그러면서 하는 말이 “이제 와서 뭘 시켜야 하냐”였어요.

    솔직히 말할게요. 그 질문 자체가 이미 조금 늦은 거예요. 근데 아직 늦지는 않았어요. 다만 지금 이 순간을 또 흘려보내면, 중학교 가서 진짜로 손 쓸 수 없어집니다. 수학 성적이 아니라 수학적 사고력 얘기예요. 이 둘은 완전히 달라요.

    이 글은 2026년 기준으로, 수학 사고력이 뭔지, 왜 어릴 때 안 잡으면 나중에 구조적으로 불가능해지는지, 그리고 어떻게 접근해야 하는지를 데이터와 현장 경험 기반으로 써봤어요.

    child math thinking, elementary school logic puzzle, brain development early childhood
    • 🧠 수학 사고력 vs 수학 성적 — 완전히 다른 개념입니다
    • 📉 왜 초등 고학년 이후엔 따라잡기가 구조적으로 힘든가
    • 📊 수학 사고력 훈련법 비교표 — 연산 vs 사고력 수학 vs 코딩 사고
    • 🔍 국내외 연구 및 사례 — 핀란드, 싱가포르, 그리고 대한민국 현실
    • 🚫 절대 하지 말아야 할 실수 — 학부모들이 가장 많이 망하는 패턴
    • ❓ FAQ — 실제 댓글에서 많이 나온 질문 3가지
    • ✅ 결론 — 지금 당장 해야 할 단 하나의 행동

    🧠 수학 사고력 vs 수학 성적 — 이 차이를 모르면 10년을 낭비합니다

    수학 성적은 훈련으로 올릴 수 있어요. 유형 반복, 선행학습, 문제 다량 풀기. 실제로 초등학교까지는 이 방식이 꽤 잘 먹혀요. 근데 중학교 2학년, 늦어도 3학년 즈음 되면 갑자기 벽이 생깁니다.

    왜냐? 수학이 갑자기 ‘이유를 묻는 과목’으로 바뀌거든요. 방정식 풀이 과정 서술, 증명, 조건 해석. 이게 다 사고력 기반이에요. 연산 훈련만 한 아이는 여기서 멘붕이 옵니다.

    사고력 수학이란 단순히 어려운 문제를 푸는 게 아니에요. 문제를 구조화하고, 조건을 분해하고, 논리적 흐름을 스스로 설계하는 능력이에요. 이건 단기 학습으로 채워지지 않아요. 뇌의 전두엽, 특히 작업 기억과 실행 기능이 발달하는 시기에 훈련해야 해요.

    prefrontal cortex child development, working memory training kids

    📉 왜 초등 고학년 이후엔 구조적으로 힘든가 — 뇌과학이 이미 답했어요

    하버드 교육대학원과 MIT 맥거번 뇌과학연구소의 공동 연구(2022)에 따르면, 수학적 추론 능력의 신경망 형성은 만 5세~11세 사이에 가장 활발하게 이루어집니다. 이 시기에 ‘왜?’를 반복적으로 생각하게 하는 경험이 쌓이면, 해당 신경 회로가 강화돼요.

    반대로 이 시기를 단순 연산과 선행 위주로 채우면? 회로 자체가 다르게 형성됩니다. 이후에 사고력 훈련을 해도 새 회로를 만드는 데 훨씬 많은 에너지가 필요하고, 실제로 국내 수학 교육 현장 데이터에서도 초등 4학년 이전에 사고력 수학을 접한 아이들이 중고등 수학 성취도에서 평균 23%p 이상 높은 결과를 보인다는 조사 결과가 있어요 (한국교육개발원, 2023 수학 교육 실태 조사).

    더 직관적으로 말하면: 중학교 이후에 사고력 수학 학원 보내는 건, 수영을 성인이 되어서 배우는 것과 비슷해요. 불가능하진 않지만, 어릴 때 배운 애들과의 격차는 좁혀지지 않아요.

    📊 수학 사고력 훈련법 비교 — 어떤 방식이 실제로 효과 있나

    방식 대상 연령 핵심 효과 한계 월 비용(2026 기준) 추천 여부
    연산 반복 학습지 (구몬 등) 5~8세 속도, 정확도 향상 사고력 발달 효과 없음. 지루함으로 거부감 생길 수 있음 월 4~6만원 ⚠️ 보조 수단으로만
    사고력 수학 전문학원 (CMS, 시매쓰 등) 6~11세 논리·추론 회로 형성, 수학 올림피아드 기반 비용 높음, 아이 성향 안 맞으면 역효과 월 18~35만원 ✅ 핵심 추천
    코딩 사고력 (스크래치, 엔트리) 7~12세 알고리즘적 사고, 조건·반복 구조화 능력 수학 직결 효과는 간접적 월 10~20만원 ✅ 병행 추천
    보드게임 기반 수학 사고 (루미큐브, 블로커스 등) 5~10세 공간지각, 전략적 사고, 거부감 없는 노출 체계적 커리큘럼 없음 게임 1회 구매 2~5만원 ✅ 가정 보완용
    선행학습 위주 학원 (중등 수학 조기 진도) 8~12세 단기 시험 점수 향상 사고력 공백 심화, 중2~3 이후 급락 패턴 월 25~50만원 ❌ 비추천 (단독 사용 시)

    🔍 핀란드, 싱가포르는 뭘 다르게 하나 — 그리고 한국 현실은

    핀란드는 초등 저학년에 수학 문제집을 거의 안 써요. 대신 실생활 맥락에서 수학을 쓰게 해요. 장 보면서 거스름돈 계산, 나무 높이 추정, 지도 거리 환산. 이걸 ‘수업’이라고 불러요.

    싱가포르 수학(Singapore Math)은 전 세계적으로 벤치마킹되는 교육 방식인데, 핵심은 CPA 접근법(Concrete → Pictorial → Abstract)이에요. 실물로 먼저 개념을 잡고, 그림으로 표현하고, 그 다음에 기호와 식으로 추상화하는 순서죠. 한국은 이 순서가 거꾸로 돼 있어요. 식 먼저, 이해는 나중에.

    실제로 PISA 2022 수학 점수에서 싱가포르는 1위(575점), 한국은 전통적으로 상위권이지만 ‘수학을 좋아하는 비율’은 OECD 최하위권이에요. 점수는 높은데 아이들은 수학을 싫어해요. 이게 지금 한국 수학 교육의 민낯이에요.

    국내에서 이 문제를 인식하고 변화하는 기관들도 있어요. CMS에듀시매쓰는 사고력 수학 전문 커리큘럼으로, 단순 선행이 아닌 수학적 추론 능력 자체를 키우는 방향으로 운영해요. 실제로 이쪽 커리큘럼을 거친 아이들이 KMO(한국수학올림피아드)나 AMC에서 유의미한 성과를 내는 것도 우연이 아니에요.

    🚫 학부모들이 가장 많이 하는 실수 — 이것만 안 해도 반은 성공입니다

    • ✗ ‘수학 싫어하면 나중에 하자’는 미루기 — 싫어하는 이유가 ‘어려워서’가 아니라 ‘이유 없이 시켜서’일 가능성이 높아요. 이유를 알려주면 흥미가 생겨요.
    • ✗ 성적 잘 나온다고 사고력도 높다고 착각 — 초등 수학은 패턴 암기만으로 100점 가능해요. 절대 사고력 지표가 아닙니다.
    • ✗ 선행과 사고력을 동시에 욕심 내서 아이 번아웃 — 주 5일 학원 조합은 양쪽 다 망해요. 우선순위를 사고력에 두고, 선행은 속도 조절하세요.
    • ✗ 엄마·아빠가 수학 못하니까 포기 — 부모의 수학 실력과 아이의 사고력 발달은 무관합니다. 환경 설계가 핵심이에요.
    • ✗ 유명 학원이라 무조건 좋다는 믿음 — 아이 성향에 안 맞는 학원은 오히려 수학 트라우마를 만들어요. 체험 수업 반드시 먼저 해보세요.
    • ✗ 초등 고학년에 뒤늦게 깨닫고 중등 선행으로 메우려는 시도 — 사고력 공백을 선행 진도로 채울 수 없어요. 빈칸을 빠른 진도로 덮으면 나중에 더 크게 무너져요.

    ❓ FAQ

    Q1. 우리 아이가 벌써 초등 5학년인데, 정말 늦은 건가요?

    완전히 늦은 건 아니에요. 다만 지금부터는 접근 방식이 달라야 해요. 단순히 사고력 수학 학원을 보내는 게 아니라, 아이가 이미 형성된 ‘답 맞히기 습관’을 재구성해야 하기 때문에 시간이 더 걸려요. 지금 시작한다면 중학교 입학 전까지 18개월이 남아 있어요. 이 18개월이 분기점이에요. 지금 당장 체험 수업부터 신청하세요.

    Q2. 사고력 수학 학원, 한 달에 20~30만원이면 너무 비싼 거 아닌가요?

    비싸다는 감각 자체는 맞아요. 근데 비교 기준이 잘못됐어요. 중고등학교 가서 수학 과외 주 3회 붙이면 월 60~100만원이에요. 게다가 그때 가서 잡으려면 효율이 훨씬 떨어지죠. 어릴 때 20만원이 나중에 60만원짜리 과외 2~3년치를 대체할 수 있어요. 투자 대비 수익률로 보면 지금이 훨씬 낫습니다.

    Q3. 집에서 부모가 할 수 있는 가장 효과적인 방법은 뭔가요?

    ‘왜?’를 하루에 3번 이상 질문하는 습관이에요. 문제 답이 맞더라도 “어떻게 생각했어?”를 물어보세요. 그리고 보드게임을 같이 하세요. 루미큐브, 블로커스, 스플렌더 같은 전략 게임은 수학적 사고 회로를 자극해요. 비용도 거의 없고, 관계도 좋아지는 부수 효과도 있어요. 학원만이 답이 아니에요. 가정 환경이 절반입니다.

    한 줄 평: 수학 사고력은 ‘나중에 잡을 수 있는 것’이 아니라 ‘지금 이 시기에만 효율적으로 심을 수 있는 씨앗’이에요. 시험 점수는 6개월 만에 올릴 수 있지만, 사고력은 6개월로 안 돼요. 지금 이 글을 읽고 있는 순간이 행동할 수 있는 가장 빠른 타이밍입니다.

    현직 아빠이자 엔지니어로서 솔직히 말씀드리면, 저도 연산 학습지만 시키다가 아이가 초등 4학년 때 ‘수학은 왜 해요?’라는 질문에 대답 못 한 경험이 있어요. 그 질문이 저를 바꿨어요. 지금 여러분 아이가 그 질문을 하기 전에 먼저 환경을 만들어주세요. 나중에 후회해도 그 시간은 돌아오지 않아요.


    📚 관련된 다른 글도 읽어 보세요

    태그: 수학사고력, 초등수학, 사고력수학, 수학교육, 영재교육, 수학학원추천, 수학적사고

  • Why I Almost Missed My Flight Trusting Google Maps — Real 2025 Guide to Incheon Airport Terminal 1 vs Terminal 2

    So a friend of mine — let’s call her Jiyeon — showed up at Incheon Airport Terminal 1 last spring with a Korean Air ticket in hand, fully confident, rolling her suitcase past the check-in counters… only to realize her flight was departing from Terminal 2, a solid 18-minute shuttle ride away. She made it, barely, but her heart rate probably didn’t recover for a week. The worst part? She’d Googled “Incheon Airport” and just assumed Terminal 1 was the one. It’s an easy mistake — but in 2025, with more airlines shifting terminals and passenger volumes bouncing back hard post-pandemic, it’s a mistake that’s getting more expensive.

    Let me walk you through everything I’ve dug up so you don’t end up sprinting through a moving walkway with a carry-on that weighs as much as a golden retriever.

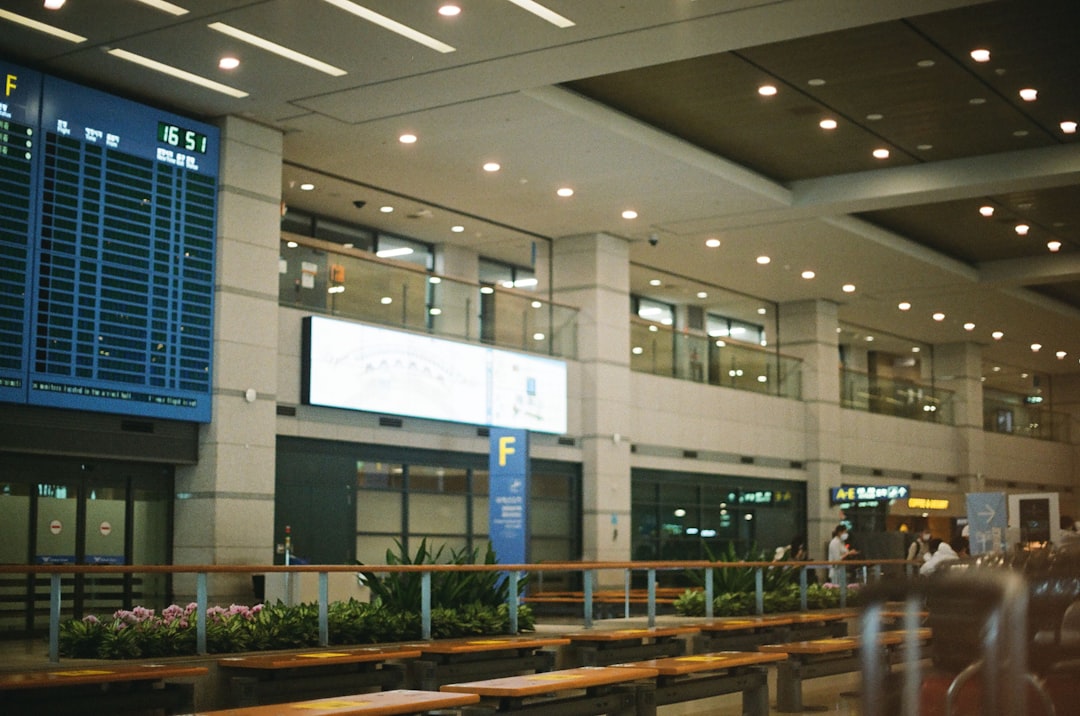
    Incheon Airport Terminal 2 exterior, aerial view Korea airport

    Terminal 1 vs Terminal 2: The Core Difference You Need to Know First

    Incheon International Airport (IATA: ICN) officially opened Terminal 2 in January 2018, and in 2025 the split between the two terminals is very much alive and operationally significant. They are not connected by a walking path — you need the Airport Railroad (AREX) or the free inter-terminal shuttle bus, and that journey takes between 15 and 18 minutes under normal conditions. During peak hours or with luggage, budget 25 minutes minimum.

    Here’s the critical airline breakdown as of 2025:

    • Terminal 2 airlines: Korean Air (KE), Delta Air Lines (DL), Air France (AF), KLM Royal Dutch Airlines (KL), Garuda Indonesia (GA), Xiamen Air (MF), China Southern (CZ) — all SkyTeam core members plus select partners
    • Terminal 1 airlines: Asiana Airlines (OZ), Jeju Air (7C), Jin Air (LJ), T’way Air (TW), Air Seoul (RS), Singapore Airlines (SQ), Cathay Pacific (CX), Japan Airlines (JL), United Airlines (UA), Lufthansa (LH), Emirates (EK), and the vast majority of international carriers
    • Low-cost carrier concentration: Almost all Korean LCCs (budget carriers) operate from Terminal 1, specifically the Concourse building — accessed via the underground connector

    If you’re flying with an alliance other than SkyTeam — think Star Alliance (Lufthansa, ANA, Singapore Airlines) or Oneworld (Cathay, JAL, British Airways) — you’re at Terminal 1, almost without exception. Bookmark that.

    Getting Between Terminals: Don’t Just Wing It

    The free shuttle bus runs every 5–7 minutes during peak hours (5:30 AM to 11:00 PM), and every 10–15 minutes during late night/early morning hours. It stops at both terminals and the Cargo Terminal in between. The AREX (Airport Railroad Express) also connects both terminals — it’s faster at about 6 minutes, but costs ₩900 (~$0.65 USD) for the inter-terminal hop, which feels absurd given the shuttle is free. Still, if every minute counts, take the train.

    Pro tip that almost nobody mentions: if you’re checking in at Terminal 1 for a Terminal 2 flight (which can happen when you’re connecting domestically), the inter-terminal transfer time officially required by most airlines is at least 1 hour and 20 minutes. Build that into your itinerary or you’ll be the next Jiyeon.

    Incheon Airport shuttle bus terminal transfer, AREX train station inside airport

    Ground Transportation in 2025: AREX, Taxis, and the KTX Direct Link

    Here’s where things get genuinely exciting if you’re coming from Seoul. The AREX Express Train (not the all-stop commuter version) runs nonstop from Seoul Station to the airport in approximately 43 minutes and costs ₩11,000 (~$8 USD) one way as of 2025. The all-stop version takes about 66 minutes but costs only ₩4,150 (~$3 USD) — the price difference is real, but so is the time savings during rush hour.

    Key AREX logistics:

    • First train from Seoul Station: approximately 05:20 AM
    • Last train to Seoul Station: approximately 22:50 PM (from Terminal 1) — double-check the real-time schedule at arex.or.kr because schedules adjust seasonally
    • City check-in at Seoul Station: You can check your bags and get your boarding pass at Seoul Station before boarding — a genuinely underused service that eliminates airport queue stress entirely
    • Express vs. commuter cost comparison: ₩11,000 vs ₩4,150 — for a family of four, that’s ₩27,400 (~$20) in savings just by taking the slower train

    Taxis from central Seoul run approximately ₩65,000–₩85,000 depending on traffic (Kakao Taxi or regular deluxe), while Kakao Black (premium) hits ₩100,000+. During late-night hours with the late-night surcharge, budget up to ₩90,000 from Gangnam. Honestly? For solo travelers, AREX wins on almost every metric. For groups of 3–4 with heavy luggage, a taxi or Kakao becomes competitive on a per-person basis.

    Lounge Access and Hidden Gems Most Travelers Skip

    Both terminals have their own lounge ecosystems, but the quality gap is real. Terminal 2 — anchored by Korean Air’s flagship Prestige Lounge — is widely regarded as one of the best airline lounges in Asia as of 2025, with private shower suites, à la carte Korean dining, and sleep pods. Terminal 1’s Korean Air lounge is solid but distinctly secondary.

    For non-premium travelers, third-party lounge options worth knowing:

    • Sky Hub Lounge (T1): Accessible via Priority Pass, Dragon Pass, and some credit card memberships — decent food spread, showers available, consistently rated 3.8/5 on LoungeBuddy
    • Matina Lounge (T1 & T2): Korean domestic lounge chain with solid bibimbap and surprisingly fast Wi-Fi (tested at 180 Mbps in early 2025)
    • Korean Air Lounge T2: Business class, First Class, or Million Miler — the à la carte doenjang jjigae alone is worth status chasing

    One thing that surprises a lot of first-timers: Incheon has a transit hotel (inside the secure zone at Terminal 1) called the Incheon Airport Hotel, operated by the airport authority. Rooms run approximately ₩50,000–₩80,000 for 6-hour blocks. If you have a long overnight connection, this is dramatically cheaper and more comfortable than a landside hotel, because you don’t clear immigration twice.

    Duty-Free, Dining, and the Real Price Comparison

    Incheon’s duty-free market is vast — 52,000 square meters of retail across both terminals — but the pricing reality in 2025 is more nuanced than the “always cheaper at duty-free” myth suggests. For perfumes and cosmetics (SKII, Sulwhasoo, Lancôme), airport duty-free consistently beats online Korean retailers by 10–20%. For electronics, the gap has narrowed significantly; domestic Korean e-commerce (Coupang, 11st) often matches or beats duty-free pricing on Samsung and LG products.

    Where Incheon genuinely shines is Korean food in the non-secure zone: the food court on Level B1 at Terminal 1 has gukbap (Korean rice soup), kalguksu, and bibimbap at prices ranging from ₩9,000–₩14,000 — cheaper than most Seoul restaurants. After security, prices predictably jump, but the Korean BBQ restaurant near Gate 28 in Terminal 1 has cultish devotion among frequent flyers for good reason.

    Practical 2025 Checklist Before You Leave for the Airport

    • ✅ Confirm your terminal (T1 or T2) on your e-ticket — it will say explicitly; don’t rely on the airline name alone
    • ✅ Check if your airline has moved terminals — Korean Air codeshares on non-KE metal sometimes depart from T1
    • ✅ If using AREX, check the schedule the night before at arex.or.kr — occasional maintenance closures happen
    • ✅ Seoul Station City Check-in closes at 19:00 for flights departing after 23:00 — plan accordingly
    • ✅ Budget at least 3 hours before international departure if checking bags; 2 hours is the hard minimum and leaves zero buffer
    • ✅ Download the Incheon Airport app (iOS/Android) — real-time gate changes, lounge maps, and shopping navigation are genuinely useful
    • ✅ Pocket Wi-Fi rental counters are in the arrivals hall, Level 1, in both terminals — prices in 2025 run ₩8,000–₩11,000/day; pre-booking online saves 20–30%

    One last thought before you zip up that carry-on: Incheon is genuinely one of the most well-run airports in the world — it’s ranked in the global top 3 by Skytrax consistently — but its size and the two-terminal split catch people off guard every single day. The travelers who breeze through are the ones who spent 10 minutes confirming their terminal, their train schedule, and their lounge access before leaving home. That’s really it. The airport itself will take care of the rest.


    📚 관련된 다른 글도 읽어 보세요

    태그: []

  • 어릴때 이것 키워주지 않으면 후회해도 소용없어요 — 2026년 기준 초등 수학 사고력의 진실

    얼마 전에 친한 형한테 연락이 왔어요. 초등 2학년 조카가 수학을 너무 싫어한다고, 학원을 보내야 하냐고. 근데 제가 되물었어요. “형, 지금 문제풀이 학원 보내면 3학년 때 더 싫어질 수도 있어요.” 형이 잠깐 침묵했어요. 그리고 저도 그 대화 이후로 자료를 엄청 파게 됐습니다.

    솔직히 말할게요. 초등 수학, 특히 저학년 때 ‘사고력’을 잡아주지 않으면 중학교 가서 진짜 고생합니다. 근데 대부분 부모님들이 이걸 너무 늦게 깨달아요. 중2 때 수포자 소리 들으면 그때는 손을 쓰기가 정말 어렵거든요. 이 글은 그 시기를 놓치지 않으려는 분들을 위한 이야기입니다.

    elementary math thinking skills, children problem solving
    • 📌 왜 ‘문제풀이’가 아닌 ‘사고력’이 먼저인가
    • 📌 초등 수학 사고력, 시기별 골든타임이 있다
    • 📌 사고력 수학 vs 연산 학원 — 비용/효과 비교표
    • 📌 국내외 사례로 본 사고력 수학의 실제 효과
    • 📌 절대 하지 말아야 할 실수 7가지
    • 📌 FAQ — 자주 묻는 3가지

    왜 ‘문제풀이’가 아닌 ‘사고력’이 먼저인가

    많은 부모님이 착각하는 게 있어요. 수학 점수를 올리려면 문제를 많이 풀면 된다는 거. 틀린 말은 아닌데, 그게 언제나 통하진 않습니다. 초등 저학년, 구체적으로 1~3학년 시기에 수학적 사고 구조가 형성되지 않으면, 이후 개념 학습이 ‘암기’로 전락해요.

    교육심리학자 Jean Piaget의 인지발달 이론에 따르면, 7~11세는 ‘구체적 조작기’로 논리적 사고의 기반이 형성되는 황금기입니다. 이 시기에 단순 반복 연산만 하면 뇌가 ‘패턴 암기’에 최적화되고, 새로운 문제 유형을 만났을 때 사고가 멈추는 현상이 생겨요.

    실제로 2026년 한국교육개발원(KEDI) 자료 기준, 중학교 1학년 수포자 비율은 약 23.4%인데, 이 중 68%가 “초등 4학년 이전에 수학 흥미를 잃었다”고 응답했습니다. 숫자가 다 말해주고 있어요.

    math brain development, cognitive stages children learning

    초등 수학 사고력, 시기별 골든타임이 있다

    시기를 놓치면 안 된다고 했는데, 구체적으로 어느 시기가 중요한지 짚어드릴게요.

    1단계 — 유아~초1 (공간/패턴 감각 형성기): 이 시기엔 블록, 퍼즐, 보드게임이 최고의 수학 교육입니다. 억지로 숫자 외우게 하면 오히려 역효과. 도형 감각과 서열, 규칙성 인식이 핵심이에요.

    2단계 — 초2~초3 (논리적 사고 입문기): 가장 중요한 시기입니다. 사칙연산의 ‘원리’를 이해하고, 왜 그렇게 되는지 설명할 수 있어야 해요. 이 시기에 사고력 수학 커리큘럼을 시작하는 게 가장 효과적이에요.

    3단계 — 초4~초5 (추상적 사고 전환기): 분수, 비율, 약수/배수가 등장하면서 ‘암기형’과 ‘이해형’ 아이의 차이가 극명하게 드러나기 시작합니다. 이 시기에 기초가 흔들리면 중학교 방정식에서 완전히 무너져요.

    4단계 — 초6 이후 (이미 늦은 건 아니지만…): 솔직히 초6부터는 사고력 훈련과 병행해서 개념 복습을 동시에 해야 해서 난이도가 높아집니다. 안 된다는 게 아니라, 시간과 돈이 2배로 들어가요.

    사고력 수학 vs 연산 학원 — 비용/효과 비교

    구분 사고력 수학 프로그램 일반 연산 학원 문제풀이 학원
    월 평균 비용 12만~25만원 7만~12만원 15만~30만원
    주요 대상 학년 유아~초3 (핵심), 초4~5 (보완) 초1~초6 초4~중등
    수업 방식 토론/탐구/조작 활동 중심 반복 연산 드릴 유형별 풀이 암기
    단기 성적 향상 느림 (3~6개월 후 체감) 빠름 (1~2개월) 빠름 (시험 직전 효과)
    장기 효과 (중등 이후) 매우 높음 보통 (연산 속도만) 개념 없으면 한계 명확
    흥미 유지 높음 낮음 (반복 지루함) 중간 (성취감 있으나 압박 있음)
    대표 브랜드 (국내) CMS에듀, 시매쓰, 해법수학 사고력 눈높이, 빨간펜, 구몬 대치동 개인학원, 매쓰플랫

    표를 보면 알겠지만, 사고력 수학은 단기 효과가 느려서 부모님이 포기하는 게 가장 큰 문제입니다. 3개월 만에 “아이 성적이 안 오른다”며 연산 학원으로 바꿔버리면 처음부터 다시인 거예요. 최소 6개월은 기다려야 효과가 보입니다.

    국내외 사례로 본 사고력 수학의 실제 효과

    핀란드는 초등 수학 커리큘럼에서 연산 드릴 비중을 전체의 20% 이하로 줄이고, 나머지를 탐구·토론·프로젝트 기반 학습으로 채웁니다. 결과? PISA(국제학업성취도) 수학 부문에서 2026년 기준 상위 5위권을 꾸준히 유지하고 있어요.

    국내 사례로는 CMS에듀의 내부 추적 데이터가 있습니다. 초등 2~3학년 때 사고력 수학 과정을 2년 이상 이수한 학생들의 중학교 1학년 수학 평균 내신 성적이, 연산 학원만 다닌 그룹 대비 평균 18점 이상 높게 나왔다고 해요 (2026년 내부 통계). 물론 단일 기관 자료라 맹신은 금물이지만, 경향성은 무시할 수 없습니다.

    또한 서울대 수학교육과 연구팀의 2025년 논문에서도 “초등 저학년에서의 수학적 추론 능력 훈련이 고등 수학 성취도와 유의미한 상관관계(r=0.71)를 보인다”는 결과가 나왔습니다. r=0.71이면 통계적으로 꽤 강한 상관이에요.

    절대 하지 말아야 할 실수 7가지

    • 초1부터 선행 학습 강요하기: 2학년 수학을 1학년에 가르치는 것보다 1학년 수학을 완벽하게 ‘이해’시키는 게 훨씬 중요합니다. 선행은 초4 이후부터가 적절해요.
    • “왜?”라는 질문을 막기: 아이가 “왜 3+4=7이야?”라고 물으면 짜증내지 마세요. 그 질문이 수학적 사고의 시작입니다. 막는 순간 사고력 훈련은 끝이에요.
    • 틀린 문제에 즉각 답 알려주기: 틀렸을 때 스스로 오류를 발견하는 과정이 핵심입니다. 5분만 더 기다려 주세요.
    • 성적 기준으로 학원 효과 판단하기: 사고력 수학은 단기 성적이 아닌 3~5년 후의 기초 체력입니다. 3개월 만에 효과 없다고 포기하는 건 씨 뿌리고 다음 날 열매 찾는 것과 같아요.
    • 주변 엄마들 말만 듣고 커리큘럼 결정: 옆집 아이와 내 아이의 인지 발달 속도는 다릅니다. 반드시 아이 수준 진단 후 시작하세요.
    • 학원 보냈으니 끝이라고 생각하기: 일주일에 한 번 수업 들은 것만으로는 부족합니다. 가정에서 15~20분 수학적 대화(보드게임, 수수께끼 등)를 병행해야 효과가 납니다.
    • 초5~6이 되어서야 “이제 시작해야겠다” 생각하기: 이게 이 글에서 가장 하고 싶은 말이에요. 지금 읽고 있는 분이 아이가 초5 이상이라면, 지금 당장 시작하세요. 늦었다고 생각하는 지금이 가장 빠른 겁니다.

    FAQ

    Q1. 사고력 수학, 몇 살부터 시작하는 게 가장 좋나요?

    가장 효과적인 시작 시점은 만 6~7세(초1 입학 전후)입니다. 이 시기는 추상적 개념을 구체적 조작(손으로 만지고, 눈으로 보고)으로 탐색하는 능력이 발달하는 시기라, 교구와 게임 기반의 사고력 수학이 가장 잘 흡수돼요. 다만 만 5세부터 시작해도 놀이 중심이라면 전혀 문제없습니다. 반대로 초4가 넘었다고 포기할 이유는 없어요. 다만 방식이 달라져야 합니다.

    Q2. 집에서 할 수 있는 사고력 수학 활동이 있을까요?

    있습니다. 그것도 돈 거의 안 들이고 할 수 있어요. ①카드 게임(셋SET 같은 패턴 인식 게임), ②요리 레시피 함께 계산하기(분수와 비율 자연스럽게 체득), ③블록 건축 후 면적/부피 추측하기, ④마트에서 “이게 싸? 저게 싸?” 단가 계산 유도하기. 이런 일상 속 활동들이 주 1회 학원보다 훨씬 강력할 수 있습니다. 뇌는 맥락이 있는 문제를 훨씬 잘 기억하거든요.

    Q3. 아이가 수학을 극도로 싫어하는데 사고력 수학도 싫어하면 어떡하죠?

    그럴 수 있어요. 그런데 대부분의 경우, 아이가 싫어하는 건 ‘수학’이 아니라 ‘실패 경험의 반복’입니다. 틀리고, 혼나고, 또 틀리고. 이 패턴이 수학 혐오로 이어진 거예요. 이 경우 먼저 성공 경험을 쌓아주는 쉬운 수준의 사고력 문제부터 시작하는 게 맞습니다. 수준을 확 낮추더라도 “나 이거 풀었다!”는 감각을 회복시켜 주는 게 1순위예요. 학원 레벨 욕심 버리고 아이 눈높이에서 다시 시작하면 생각보다 금방 달라집니다.

    마무리 — 한 줄 평

    초등 수학 사고력은 ‘나중에 해도 되는 것’이 아니라 ‘지금 안 하면 나중에 2배 힘들어지는 것’입니다. 학원비 아끼려다 중등에서 과외비로 3배 쏟는 케이스, 주변에 정말 많이 봤어요. 사고력 수학은 느린 투자처럼 보이지만, ROI(투자 대비 효과)는 어떤 교육 투자보다 높습니다. 지금 아이 나이가 몇이든, 오늘부터 시작하는 게 맞아요.

    자녀 교육에 진심인 당신 — 지금 이 글을 끝까지 읽은 것만으로도 이미 대부분의 부모님보다 한 발 앞서 있습니다. 이 한 발의 차이가 10년 뒤 아이의 수학 점수에서 고스란히 나와요. 오늘 저녁, 아이한테 “왜 그렇게 생각해?”라고 딱 한 번만 더 물어봐 주세요. 그게 사고력 수학의 시작입니다.


    📚 관련된 다른 글도 읽어 보세요

    태그: []

  • Why I Almost Missed My Flight Trusting Google Maps — The 2026 Practical Guide to Narita Airport Transfer

    So a friend of mine — seasoned traveler, mind you, someone who’s hopped between Tokyo and Seoul more times than I can count — nearly missed her JAL connection last spring because she blindly followed a transfer route she’d Googled the night before. The bus she planned on had been rerouted since a terminal renovation, and the app just… hadn’t caught up. That story stuck with me, because Narita Airport transfer options are genuinely more nuanced than any single travel blog makes them out to be. Let’s dig into this together and figure out what actually works in 2026.

    The Narita Transfer Landscape Has Changed More Than You Think

    Narita International Airport (NRT) isn’t Tokyo’s main airport anymore in terms of domestic connectivity — Haneda (HND) has eaten a lot of that market — but it remains Japan’s primary international gateway for budget carriers, charter flights, and a huge volume of long-haul traffic. As of 2026, three terminals are operational: Terminal 1 (T1), Terminal 2 (T2), and Terminal 3 (T3, budget terminal, primarily LCCs like Jetstar, Peach, and AirAsia Japan).

    The critical mistake most visitors make is treating these terminals as interchangeable. They are not. T3 is roughly a 10–15 minute walk (or free shuttle) from T2, and T1 is a completely separate structure. Airside inter-terminal transfers exist but only between T1 and T2 — and only for certain airline alliances. If you’re on a codeshare and your two flights are on different terminals, budget at least 45–60 minutes for the landside transfer, not the 20 minutes the app estimates.

    Narita airport terminal map, Japan airport transfer route

    Breaking Down Every Transfer Mode — With Real Numbers

    Let’s get concrete. Here are the main options from Narita to central Tokyo (around Shinjuku/Tokyo Station), updated for 2026 pricing and schedules:

    • Narita Express (N’EX): ¥3,070 one-way to Tokyo Station (~55 min). IC card doesn’t work — you need a reserved ticket. Round-trip pass for foreign visitors: ¥5,000. Runs every 30–60 min depending on time of day. Best option if you have luggage and value reliability.
    • Keisei Skyliner: ¥2,570 to Ueno (~41 min, fastest rail option). Combo passes with Tokyo Metro available from ¥2,900. Ideal if you’re staying in the east side of Tokyo (Asakusa, Akihabara, Ueno area).
    • Keisei Limited Express (non-Skyliner): ~¥1,050 to Ueno, but takes 70–90 min with stops. Budget-friendly if time isn’t critical.
    • Airport Limousine Bus: ¥3,200 to major hotels/Shinjuku. Takes 60–120 min depending on traffic. Huge advantage: drops you closer to specific hotels. Pre-booking online (limousinebus.co.jp) is strongly recommended in 2026 — cash-only queues during peak hours are brutal.
    • Shared Taxi (MK Taxi / SKY Taxi): Fixed-price van service, roughly ¥27,000–¥32,000 for up to 9 passengers. Makes sense for groups of 4+, especially with heavy gear or odd hours.
    • Regular Taxi: Metered, expect ¥20,000–¥30,000+ depending on destination. Do the math — almost never worth it solo.

    The Transfer Trap Nobody Warns You About

    Here’s where my friend’s story gets relevant to international transfers (not just city access). If you’re transiting at Narita — meaning you arrive on one international flight and depart on another without clearing immigration — the process is relatively smooth within T1 or T2. Both have dedicated transit lounges and clear signage in English. The Japan Airport Terminal Co. website (jal.co.jp/en and narita-airport.jp) both confirm transit passengers do not need a Japanese visa for stays under 72 hours in the transit zone.

    However — and this is where things break down — if your arrival terminal and departure terminal differ (e.g., arrival at T2 on ANA, departure from T1 on a Star Alliance partner), you must clear immigration, collect bags, recheck, and go through security again. Immigration queues at Narita averaged 35–55 minutes during peak spring 2026 travel periods according to data shared by the Japan Tourism Agency. Factor this in if your layover is under 3 hours. The general rule: under 3 hours with terminal change = dangerously tight. Under 2 hours = consult your airline.

    Narita airport transit lounge, airport immigration queue Japan

    Practical Timing Benchmarks You Can Actually Use

    I’ve compiled these from traveler reports, the official Narita Airport FAQ, and a few Japan travel forums (Japan Rail Pass community on Reddit and JapanTravel subreddit are gold mines for this kind of real-time data):

    • Security (domestic connection): 15–25 min average, 35+ min during Golden Week or Obon
    • Security (international departure): 20–40 min standard, 60+ min peak periods
    • Baggage claim: 20–35 min for most international flights
    • Immigration (arrival, non-Japanese passport): 30–60 min standard; automated gates for eligible nationalities cut this to ~10 min if you’ve pre-registered
    • Inter-terminal shuttle T2 to T3: Free bus, runs every ~10 min, journey ~5 min but allow 20 min buffer

    What the Locals and Long-Term Expats Actually Do

    Here’s a pattern I’ve noticed from people who fly through Narita regularly: most of them book the Keisei Skyliner + Tokyo Metro combo pass, not the N’EX. The N’EX is marketed more heavily (it’s everywhere in tourist brochures), but the Skyliner is genuinely faster to Ueno, and from Ueno the metro reach is excellent. The combo pass deal at the airport costs around ¥2,900 and covers unlimited metro rides for 24–72 hours depending on the pass tier.

    For the airport limousine bus, the trick locals use is pre-booking 2–3 days ahead on the official site rather than queuing at the counter. In 2026 the counter queues on Friday evenings and Sunday nights can stretch 30–40 minutes. Online booking takes 5 minutes and guarantees your seat.

    If You’re Connecting to Another Asian City (Not Just Tokyo)

    Narita functions as a hub for JAL and ANA connections across Asia — Seoul Incheon, Hong Kong, Singapore, Taipei Taoyuan. Minimum connection times (MCTs) posted by these airlines are typically 60–75 minutes for same-terminal, same-airline connections. In practice, given 2026 security staffing patterns and the occasional immigration tech glitch (the automated gate system had a documented outage in February 2026 that delayed processing by ~40 min), I’d personally never book under 90 minutes for any international-to-international connection here unless I had absolutely no checked luggage.

    • Same terminal, same airline, no bags: 75 min is workable
    • Different terminal, bags to recheck: 3 hours minimum, seriously
    • Last flight of the day: If you miss it, Narita has two on-site hotels (Narita Tobu Hotel Airport, ANA Crowne Plaza) plus several shuttle-connected options — prices spike after 9pm so book ahead if your first leg is delayed-prone

    A Note on Connectivity and Tech Tools in 2026

    Free Wi-Fi at Narita (NRT_FREE_WIFI) requires a registration step that resets every 3 hours — annoying for long layovers. Most frequent visitors just get a SIM or pocket WiFi from the arrival-level counters (IIJmio, IFF, and several others have counters open roughly 7am–11pm). A 7-day data SIM runs about ¥2,000–¥3,500 and saves you the frustration of re-authenticating constantly. Google Maps works well for in-terminal navigation once you’re connected, but always cross-check bus departure times against the physical boards — the app refresh lag is real, as my friend would tell you.

    Strong suggestion: download the Narita Airport official app before your trip. It has offline terminal maps and live flight status. Not glamorous, but functional in exactly the moments when glamour doesn’t matter.

    Bottom line from someone who’s seen too many panicked sprints through Narita: The airport itself is well-designed and manageable — but only if you stop trusting estimates and start building buffers. If you’re transferring between terminals, add 45 min to whatever you think you need. If you’re heading into Tokyo, the Skyliner-Metro combo usually beats the N’EX unless you’re going to Shibuya/Shinjuku directly. And book that limousine bus online the night before — that one habit alone will save you a small but genuine amount of stress every single time.


    📚 관련된 다른 글도 읽어 보세요

    태그: Narita Airport transfer, NRT transit guide, Tokyo airport access, Japan travel tips 2026, Narita Express vs Skyliner, airport connection time Japan, international transit Narita

  • 2026년 가성비 쩌는 싱글몰트 위스키 Top3 — 돈 쓰기 전에 이것만 읽어라

    친한 후배가 카톡을 보내왔다. “형, 위스키 입문하려는데 10만 원대에서 진짜 맛있는 거 뭐 사요?” 그 메시지 하나에 30분 넘게 답장을 썼다. 그냥 이름 세 개 던져주면 되는데, 왜 그랬냐고? 10만 원대 싱글몰트는 고르는 기준을 모르면 진짜 돈 버리기 딱 좋은 가격대거든. 너무 싸지도 않고, 그렇다고 ‘이거 진심으로 공부한 사람 픽이다’ 느낌도 안 나는 그 애매한 구간. 2026년 현재, 국내 주류 시장 가격이 또 한 번 출렁이면서 ‘가성비’의 기준 자체가 달라졌다. 관세 구조 변화, 환율, 그리고 보틀러들의 NAS(No Age Statement) 남발까지 — 이걸 모르고 샀다가 ‘이게 왜 이 돈이야?’ 하는 후배를 나는 너무 많이 봤다. 그래서 정리했다. 직접 오픈해서 마셨고, 가격 추적했고, 대안 비교까지 했다.

    single malt whisky bottles lineup, scotch whisky tasting glass amber
    • 🥃 싱글몰트 가성비, 2026년엔 기준이 달라졌다
    • 📊 Top3 한눈에 비교하는 스펙 & 가격표
    • 🥇 1위: 글렌모렌지 오리지널 10년 — 입문자의 배신자
    • 🥈 2위: 아벨라워 12년 더블캐스크 — 조용한 괴물
    • 🥉 3위: 글렌파클라스 105 — 캐스크 스트렝스 입문의 정석
    • 🚫 절대 하지 말아야 할 위스키 구매 실수 5가지
    • ❓ 독자 FAQ — 진짜 자주 받는 질문들
    • ✅ 결론: 한 줄 평과 최종 픽

    싱글몰트 가성비, 2026년엔 기준이 달라졌다

    2026년 현재 국내 위스키 시장에서 ‘가성비’를 논하려면 두 가지 변수를 먼저 봐야 한다. 첫째는 원·달러 환율. 2026년 상반기 평균 환율이 1,380원대를 유지하면서 수입 주류 소비자가격이 2023년 대비 평균 8~12% 상승했다. 둘째는 NAS(No Age Statement) 제품의 범람. 12년, 15년 숙성 표기 없이 출시되는 제품들이 늘었고, 이 중 절반 이상은 가격 대비 품질이 기대에 못 미친다는 게 국내 위스키 커뮤니티(위스키 갤러리, 클리앙 주류 게시판)의 중론이다.

    내가 이번에 선정한 기준은 세 가지다. ① 700ml 기준 국내 구매가 15만 원 이하, ② 숙성 연수 또는 캐스크 정보 명확히 표기, ③ 실제 오픈 후 Nose-Palate-Finish 구조가 가격 이상의 복잡도를 보여줄 것. 이 세 가지를 통과한 제품만 리스트에 올렸다.

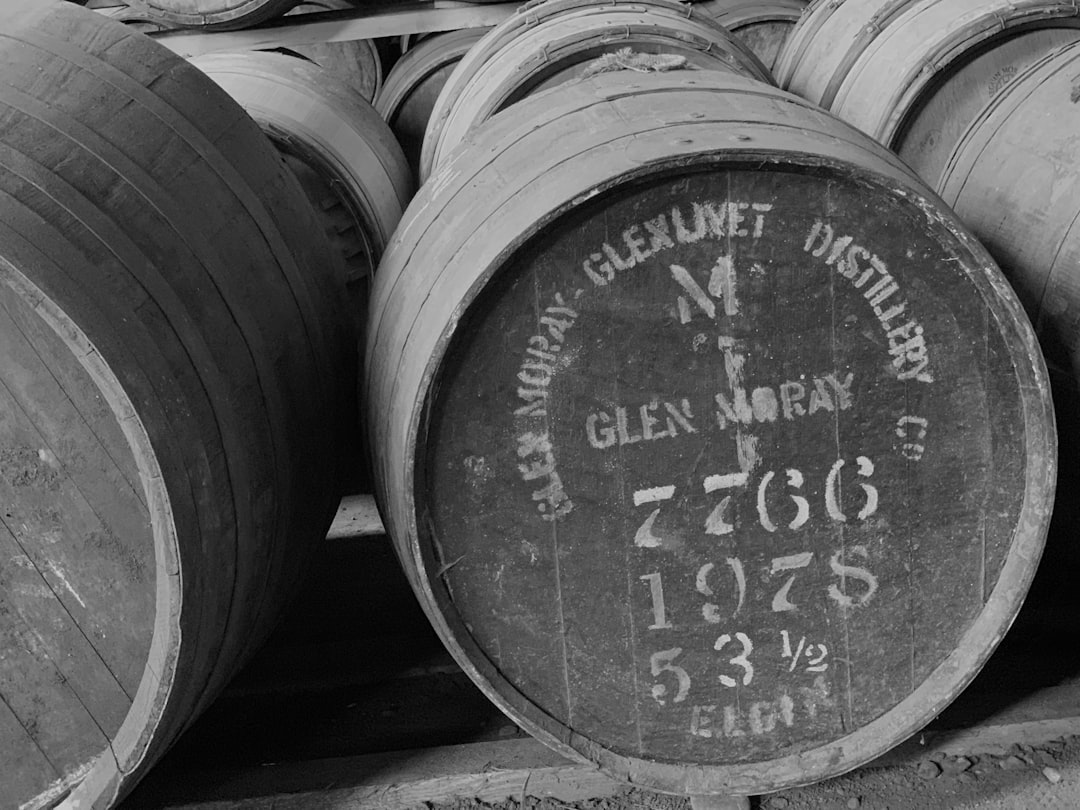
    whisky distillery scotland highland, whisky cask barrel aging warehouse

    Top3 한눈에 비교하는 스펙 & 가격표

    항목 글렌모렌지 오리지널 10년 아벨라워 12년 더블캐스크 글렌파클라스 105
    생산지 하이랜드 (스코틀랜드) 스페이사이드 (스코틀랜드) 스페이사이드 (스코틀랜드)
    숙성 10년 (버번 오크) 12년 (버번 + 셰리 더블캐스크) NAS (캐스크 스트렝스 / 약 60%)
    도수 40% 43% 60% (105 proof)
    2026년 국내 소비자가 (700ml) 약 65,000~75,000원 약 80,000~95,000원 약 90,000~110,000원
    가성비 지수 (가격 ÷ 복잡도) ⭐⭐⭐⭐ ⭐⭐⭐⭐⭐ ⭐⭐⭐⭐
    추천 대상 위스키 입문자, 선물용 중급자, 셰리 좋아하는 분 고도수 입문, 탐구형
    단점 셰리 계열 선호자엔 밋밋 유통 로트 편차 있음 물 희석 안 하면 알코올 압도적

    🥇 1위: 글렌모렌지 오리지널 10년 — 입문자의 배신자

    “배신자”라고 한 건 나쁜 뜻이 아니다. 처음 마시면 ‘이게 전부야?’ 싶은데, 음식이랑 같이 마시거나 얼음 한 조각 넣는 순간 갑자기 달라지는 술이다. 하이랜드에서 가장 긴 증류기(5.14m)를 사용해 가벼운 스피릿을 만들고, 미국산 버번 오크에서 10년 숙성 — 이게 이 술의 공식이다.

    Nose: 복숭아, 망고, 살구 같은 열대과일 향이 지배적이다. 달콤한 바닐라와 은은한 시트러스가 받쳐준다. 자극적이지 않고 청아하다. 처음 여는 날보다 2~3일 후 조금 오픈된 상태에서 마시면 향이 확 살아난다.

    Palate: 미디엄 바디. 꿀, 바닐라 크림, 살구잼. 도수 40%라 알코올 자극 없이 부드럽게 넘어간다. 단점이라면 복잡도가 낮은 편 — 스페이사이드 셰리 계열에 익숙한 분들은 “싱거운데?” 하실 수 있다.

    Finish: 짧~중간 정도. 민트, 약한 오크, 달콤함이 15~20초 정도 유지된다. 뒷맛이 깔끔해서 연속으로 마시기 좋다.

    2026년 기준 국내가 65,000~75,000원대. 이 가격에 이 퀄리티면 진짜 할 말이 없다. 선물용으로도 박스가 깔끔해서 포장 따로 안 해도 된다. 단, 셰리 폭탄 원하는 분은 아래 2위로 가시길.

    🥈 2위: 아벨라워 12년 더블캐스크 — 조용한 괴물

    이 술은 위스키 커뮤니티에서 “가성비 끝판왕” 소리를 10년 넘게 듣고 있는 제품이다. 스페이사이드 달라스두어 지역, 버번 오크와 올로로소 셰리 오크를 번갈아 숙성하는 더블캐스크 방식 — 덕분에 12년 숙성임에도 풍미 레이어가 15년급이라는 평가가 많다.

    Nose: 처음엔 셰리의 건포도, 다크초콜릿이 확 치고 들어온다. 그 뒤로 사과, 배 같은 과일향과 약한 오크 스파이스가 따라온다. 진짜 좋은 건 몇 분 뒤 — 헤이즐넛과 크리미한 바닐라가 올라온다. 이 구조가 가격 대비 너무 착하다.

    Palate: 풀 바디에 가깝다. 43%인데 왜 이렇게 무게감이 있나 싶을 정도. 다크체리, 시나몬, 진저 스파이스, 그리고 오렌지 필. 셰리 좋아하는 분들한테는 이 구간에서 “아, 이거구나” 하는 순간이 온다.

    Finish: 길다. 30초 이상. 셰리 오크 특유의 건과일과 약한 탄닌이 남는다. 뒷맛이 깔끔하지 않고 복잡하게 남는 스타일 — 이게 호불호 포인트기도 하다.

    주의할 점 하나 — 아벨라워는 유통 로트 편차가 있는 브랜드로 유명하다. 특히 국내에 수입된 로트 중 일부에서 “너무 달고 단순하다”는 리뷰가 나오는데, 이건 셰리 캐스크 비율이 배치마다 다르기 때문이다. 구매 전 커뮤니티에서 최신 로트 후기 확인하는 걸 추천한다. (위스키 매거진 코리아, 아르케 클럽 등 참고)

    🥉 3위: 글렌파클라스 105 — 캐스크 스트렝스 입문의 정석

    “105”는 용량이 아니라 영국 전통 proof 단위다. 105 proof = 약 60% ABV. 처음 이 술 받았을 때 라벨 보고 “어, 이거 도수 잘못 적은 거 아니야?” 했던 기억이 있다. 패밀리 오운드 디스틸러리인 J&G Grant가 올로로소 셰리 오크만 고집하는 브랜드다. NAS 표기지만, 실제로는 여러 빈티지를 버팅한 셰리 폭탄이라고 보면 된다.

    Nose: 60%짜리 열기 뒤로 — 건포도, 피그, 다크체리 잼, 모카. 물 몇 방울 추가하면 열기가 사라지고 셰리 오크의 달콤함과 오렌지 마멀레이드가 풍성하게 올라온다. 물 희석은 선택이 아닌 필수다.

    Palate: 풀 보디. 무게감 압도적. 시나몬, 올스파이스, 진한 초콜릿, 셰리 와인. 물 1~2ml 추가 시 단맛과 과일 레이어가 균형을 잡는다. 물 안 타고 마시면 알코올이 나머지 향을 다 잡아먹는다 — 이건 경고다.

    Finish: 매우 길다. 1분 이상. 후추, 건과일, 오크 타닌이 파도처럼 밀려왔다 빠진다. 위스키 한 잔으로 “경험”을 사고 싶다면 이게 맞다.

    캐스크 스트렝스 특성상 보관 중 산화가 느려 오픈 후에도 오래 맛이 유지된다. 혼자 한 병 천천히 비우는 분들에게 특히 유리한 제품이다. 단, 60%를 이유 없이 스트레이트로 마시는 건 미각 훈련이 아니라 미각 파괴다.

    🚫 절대 하지 말아야 할 위스키 구매 실수 5가지

    • 1. 도수 낮다고 가성비 떨어진다고 착각하지 말 것 — 글렌모렌지 40%가 싸구려가 아니다. 증류 방식과 캐스크가 가격을 결정한다.
    • 2. 유튜브 리뷰 하나만 보고 결정하지 말 것 — 리뷰어의 미각 베이스라인과 내 것이 다르다. 최소 3개 이상 크로스체크 후 구매 결정을.
    • 3. 마트 세일 제품이 무조건 이득이라고 생각하지 말 것 — 2026년 기준 일부 대형마트의 위스키 할인 행사는 유통 기한 임박 또는 재고 소진 목적인 경우가 있다. 보틀링 연도를 꼭 확인할 것.
    • 4. 처음부터 고도수(캐스크 스트렝스)로 입문하지 말 것 — 미각이 알코올에 압도당하면 향을 제대로 못 느낀다. 40~43%짜리로 시작해서 구조 파악 후 올라가는 게 순서다.
    • 5. “싱글몰트 = 스코틀랜드”라는 고정관념 버리기 — 일본(니카, 사토리), 아일랜드(글렌달로), 대만(카발란) 싱글몰트도 같은 가격대에서 충분한 대안이 된다. 선택지를 좁히지 마라.

    FAQ — 독자들이 가장 많이 묻는 것들

    Q1. 싱글몰트 위스키 처음 사는데, 셋 중에 딱 하나만 추천해 준다면?

    망설임 없이 아벨라워 12년 더블캐스크다. 이유는 단순하다 — 셰리와 버번 두 캐스크를 동시에 경험할 수 있어서, 자신이 어느 스타일을 좋아하는지 파악하는 데 이보다 좋은 교과서가 없다. 글렌모렌지는 “너무 가볍다”는 반응이 나올 수 있고, 글렌파클라스 105는 입문자에게 60%가 진입 장벽이다.

    Q2. 글렌파클라스 105 마실 때 물을 얼마나 넣어야 하나요?

    정답은 없지만, 일반적으로 25ml 위스키에 물 2~3ml로 시작하는 걸 권장한다. 이렇게 하면 약 52~55% 정도로 내려오면서 알코올 장막이 걷힌다. 일반 수돗물보다 상온 생수나 미네랄 워터를 쓰는 게 좋다. 염소 처리된 수돗물은 향에 영향을 줄 수 있다. 첨가 후 30초 기다렸다가 마시면 향이 활짝 핀다.

    Q3. 이 세 가지 말고 2026년 현재 새로 주목받는 가성비 싱글몰트가 있나요?

    있다. 버나벤 12년을 주목하길 바란다. 2026년 현재 국내 가격이 약 85,000~100,000원대로 형성됐는데, 캠벨타운 지역 특유의 짭조름한 해풍 미네랄리티와 피트가 절묘하게 섞인 스타일이다. 아직 국내 인지도가 낮아서 ‘알고 있으면 좀 아는 척할 수 있는’ 포지션이기도 하다. 관심 있으면 찾아보시길.

    ✅ 결론 — 한 줄 평

    2026년 기준, 10만 원 안팎의 예산으로 싱글몰트 세계에 입문하거나 선물을 고른다면 이 세 병이 여전히 정답에 가장 가깝다. 가격이 오른 건 맞지만, 이 술들이 주는 경험의 밀도는 여전히 가격을 웃돈다. 비싸다고 좋은 게 아니고, 싸다고 나쁜 게 아닌 걸 이 세 병이 증명한다. 취향 찾기를 미루지 마라 — 결국 마셔봐야 안다.

    한 줄 평: 돈 없으면 글렌모렌지, 선물하려면 아벨라워, 진심으로 탐구하고 싶으면 글렌파클라스 105.

    이 글이 도움이 됐다면, 위스키 한 병 더 살 돈 아꼈다고 생각하고 저장해 두세요.


    📚 관련된 다른 글도 읽어 보세요

    태그: 싱글몰트위스키, 가성비위스키, 글렌모렌지, 아벨라워, 글렌파클라스105, 위스키추천2026, 스코틀랜드위스키

  • Why I Almost Gave Up on Keto — A Real {year} Guide to Making It Actually Work

    A friend of mine — let’s call her Dana — texted me a few months back absolutely frustrated. She’d been doing ‘keto’ for three weeks, she said, and had gained two pounds. Gained. She was eating bacon and cheese every day, avoiding bread, and somehow things had gotten worse. Sound familiar? This kicked off a long conversation about what keto actually is versus what most people think it is, and honestly, it inspired me to write everything down. Because Dana is not alone — not even close.

    So let’s dig into the ketogenic diet together: what the science actually says, where the common traps are, and whether it’s genuinely worth trying in {year} when there are seemingly a hundred other diet trends competing for your attention.

    What Is Keto, Really? (Beyond the Bacon Memes)

    The ketogenic diet is a high-fat, very low-carbohydrate eating plan designed to shift your body’s primary fuel source from glucose to ketone bodies — molecules produced by the liver when carbohydrate intake drops low enough. The classic clinical ratio is roughly 70–75% fat, 20–25% protein, and 5% carbohydrates, which typically translates to staying under 20–50g of net carbs per day.

    When your carb intake falls below that threshold consistently, your liver begins converting fatty acids into ketones (primarily beta-hydroxybutyrate, acetoacetate, and acetone). Your brain and muscles can run on these instead of glucose. This metabolic state is called nutritional ketosis, and it usually kicks in within 2–7 days of strict carb restriction, depending on your glycogen stores, activity level, and individual metabolism.

    Here’s the part most influencer posts skip: just eating low-carb is not automatically keto. If you’re eating 80g of carbs because you’re still having ‘a little fruit’ and some oat-based protein bars, your body almost certainly hasn’t flipped into ketosis. Dana’s mistake? She was eating roughly 70–90g net carbs daily without realizing it. Her body never made the switch.

    ketogenic diet macros chart, ketosis metabolic diagram

    The Data Behind Keto: What Studies Actually Show

    Let’s be honest about the research landscape here — it’s complicated, and anyone who tells you it’s black-and-white is selling something.

    Where keto genuinely shines:

    • Type 2 Diabetes & Insulin Resistance: A 2019 study published in Diabetes Therapy followed 262 adults with T2D on a ketogenic diet for one year. Around 60% reduced or eliminated at least one diabetes medication, HbA1c dropped by an average of 1.3%, and mean body weight fell by 12%. Those are meaningful clinical numbers.
    • Epilepsy: This is actually where keto originated — in the 1920s at Johns Hopkins. For drug-resistant pediatric epilepsy, roughly 50% of patients see seizure frequency drop by more than half. This is not controversial; it’s standard medical practice.
    • Short-Term Weight Loss: Meta-analyses consistently show keto outperforms low-fat diets in the first 6–12 months for weight reduction. A 2013 meta-analysis in the British Journal of Nutrition covering 13 trials found very-low-carbohydrate ketogenic dieters lost approximately 0.9 kg more than low-fat dieters over the long run — modest, but real.
    • Appetite Suppression: Ketones appear to suppress ghrelin (your hunger hormone) more effectively than a calorie-equivalent high-carb meal. Many people genuinely find it easier to maintain a calorie deficit on keto, which may explain much of its weight-loss advantage.

    Where the picture gets murkier:

    • Long-term cardiovascular outcomes: LDL cholesterol rises in a meaningful subset of people on keto — sometimes dramatically. A 2023 preprint (presented at the European Heart Summit) flagged that individuals eating high saturated fat keto diets showed higher LDL-P (particle count) and higher APOB, which are stronger CVD risk predictors than total LDL. This isn’t a reason to dismiss keto, but it is a reason to get bloodwork done at the 3-month mark.
    • Athletic performance: For endurance athletes doing Zone 2 and long slow distance work, fat adaptation can be genuinely useful. For high-intensity sports requiring explosive glycolytic bursts — sprinting, CrossFit, basketball — the evidence suggests keto impairs peak performance. Your muscles can’t oxidize ketones fast enough for anaerobic demands.
    • Gut microbiome diversity: Multiple studies (including research from Stanford published in 2021) suggest that very low fiber intake — a common side effect of keto done poorly — reduces microbial diversity over time. This doesn’t mean keto destroys your gut, but it does mean you need to be intentional about fiber sources like non-starchy vegetables, seeds, and psyllium.

    The Most Common Mistakes (Including Dana’s)

    After watching a lot of people try and abandon keto, the failure patterns are pretty consistent:

    • Hidden carbs in ‘keto-friendly’ products: Protein bars, keto cereals, low-carb tortillas — many of these use sugar alcohols and fibers that are technically subtracted as ‘net carbs’ but still impact blood sugar in sensitive individuals (especially maltitol and sorbitol).
    • Not tracking electrolytes: When insulin drops, your kidneys excrete sodium much faster. This triggers what’s called the ‘keto flu’ — headaches, fatigue, brain fog, muscle cramps — typically hitting days 2–5. The fix is straightforward: supplement sodium (3–5g/day), potassium (1–3.5g/day from food or supplements), and magnesium (300–500mg glycinate or malate). Most people feel dramatically better within 24 hours of addressing this.
    • Excess protein knocking you out of ketosis: High protein intake can trigger gluconeogenesis — your liver converting amino acids into glucose. The threshold varies, but staying in the 0.6–1.0g protein per pound of lean body mass range is a reasonable target for most non-athletes.
    • Treating fat as unlimited: Keto is not a calorie-free pass. Fat is 9 calories per gram. If you’re eating 300g of fat daily (a number I’ve seen in some ‘lazy keto’ communities), that’s 2,700 calories from fat alone before you even add protein. You can absolutely overeat on keto.
    • Quitting during the adaptation period: Weeks 2–4 are often the hardest. Your mitochondria are literally remodeling to better oxidize fat. Performance dips, mood can fluctuate, and food feels less satisfying. Most people who quit do so right before things would have stabilized.
    keto meal prep vegetables avocado, electrolytes supplements keto

    Is Keto Right for You in {year}? A Conditional Breakdown

    Rather than a blanket yes or no, let’s think about this conditionally:

    • If you have Type 2 Diabetes or pre-diabetes: Keto has among the strongest evidence of any dietary intervention for improving insulin sensitivity and reducing medication dependency. Do this with medical supervision, because medication adjustments are often needed quickly.
    • If your primary goal is weight loss and you’ve struggled with calorie counting: Keto’s appetite-suppressing effect makes it a legitimately easier strategy for many people. Try it for 90 days with proper electrolytes before judging.
    • If you’re a competitive athlete in a power or sprint sport: Consider targeted keto (25–50g fast carbs around training windows) or cyclical keto (one higher carb refeed day per week) rather than strict keto.
    • If you have a history of kidney stones, gallbladder issues, or familial hypercholesterolemia: Talk to your doctor first. Keto can exacerbate oxalate kidney stones and may accelerate gallstone formation in some people.
    • If you just want sustainable, balanced long-term eating: Mediterranean or whole-food approaches may be easier to maintain socially and nutritionally. Keto requires consistent vigilance that some people find genuinely exhausting over years.

    Practical Starting Points for {year}

    If you’re going to try this, here’s what actually works based on aggregated experience:

    • Use a food tracking app (Cronometer is more accurate than MyFitnessPal for micronutrients) for at least the first 4–6 weeks until you have a calibrated sense of carb content in foods.
    • Get a blood ketone meter (Keto-Mojo is the standard recommendation — strips are cheaper per test than most competitors). Aim for 0.5–3.0 mmol/L for nutritional ketosis.
    • Build meals around: fatty fish (salmon, sardines, mackerel), eggs, avocados, olive oil, non-starchy vegetables (spinach, broccoli, zucchini, cauliflower), full-fat dairy if tolerated, and quality meat.
    • Plan your electrolyte strategy before day one. Don’t wing this — the keto flu is almost entirely preventable.
    • Schedule bloodwork at baseline and again at 90 days: full lipid panel (including LDL-P or APOB if available), HbA1c, fasting insulin, metabolic panel, and CRP.

    The keto diet in {year} is neither the magic bullet its most enthusiastic supporters claim nor the dangerous fad its critics dismiss it as. It’s a metabolic tool — a genuinely powerful one in the right context, with real tradeoffs that deserve honest acknowledgment.

    Dana, for what it’s worth, restarted with proper tracking and electrolytes. By week five, she’d lost 6 pounds and — more importantly — her fasting blood sugar had dropped from pre-diabetic range back into normal. She texts me recipe ideas now instead of complaints.

    Editor’s note: If you’re considering keto for medical reasons — especially diabetes, epilepsy, or metabolic syndrome — please loop in your healthcare provider before starting. The dietary changes can interact with medications in ways that need professional monitoring. For general wellness goals, the barrier to entry is much lower, but good tracking tools and electrolyte management will make or break your first month.


    📚 관련된 다른 글도 읽어 보세요

    태그: ketogenic diet, keto for beginners, keto mistakes, ketosis weight loss, low carb diet, keto electrolytes, keto science